> ## Documentation Index
> Fetch the complete documentation index at: https://documentation.idenfy.com/llms.txt
> Use this file to discover all available pages before exploring further.
# Adobe Commerce
> Install, configure, and manage the iDenfy identity verification plugin for Adobe Commerce with step-by-step setup and upgrade guides.
This guide explains how to connect and set up iDenfy with Adobe Commerce solutions. Below you will find step-by-step instructions on how to install, upgrade, and uninstall the iDenfy plugin.
Before installing the extension, please make sure to **back up your website and database**. We also recommend testing the extension before installing it in your production environment.
## Installation
There are two main ways to install the module:
1. Go to the [Adobe Commerce Marketplace](https://commercemarketplace.adobe.com) and order the free iDenfy extension. You need to be logged into your Marketplace account to complete the order.
2. Open the terminal and in your project's directory run the following commands:
```bash theme={"system"}
$ php bin/magento maintenance:enable
> composer require idenfy/module-customer-verification
```
You may be prompted to enter your username and password. If so, provide your [Adobe Commerce authentication keys](https://experienceleague.adobe.com/en/docs/commerce-operations/installation-guide/prerequisites/authentication-keys).
3. Next, run these commands:
```bash theme={"system"}
$ php bin/magento setup:upgrade
> php bin/magento setup:di:compile
> php bin/magento setup:static-content:deploy -f
> php bin/magento cache:clean
> php bin/magento maintenance:disable
```
Visit the [GitHub repository](https://github.com/idenfy/idenfy-magento) for additional information.
1. Add the repository to your composer file and require the package:
```bash theme={"system"}
$ composer config repositories.idenfy git https://github.com/Skullsneeze/idenfy-magento2.git
> composer require idenfy/module-customer-verification
```
2. Enable the extension:
```bash theme={"system"}
$ php bin/magento module:enable Idenfy_CustomerVerification
> php bin/magento setup:upgrade
> php bin/magento setup:di:compile
> php bin/magento setup:static-content:deploy -f
```
You may be prompted to enter your username and password. If so, provide your [Adobe Commerce authentication keys](https://experienceleague.adobe.com/en/docs/commerce-operations/installation-guide/prerequisites/authentication-keys).
## Configuration
**Requirements:**
* Live **production environment** (available via the [Pricing page](https://idenfy.com/pricing-plans-v2/))
* **API key** and **API secret** -- generated via the [dashboard](/guides/dashboard/settings/api-keys)
* **Webhook** setup on the iDenfy admin [dashboard](https://admin.idenfy.com/settings/v2/system-notifications)
### Configure API Credentials
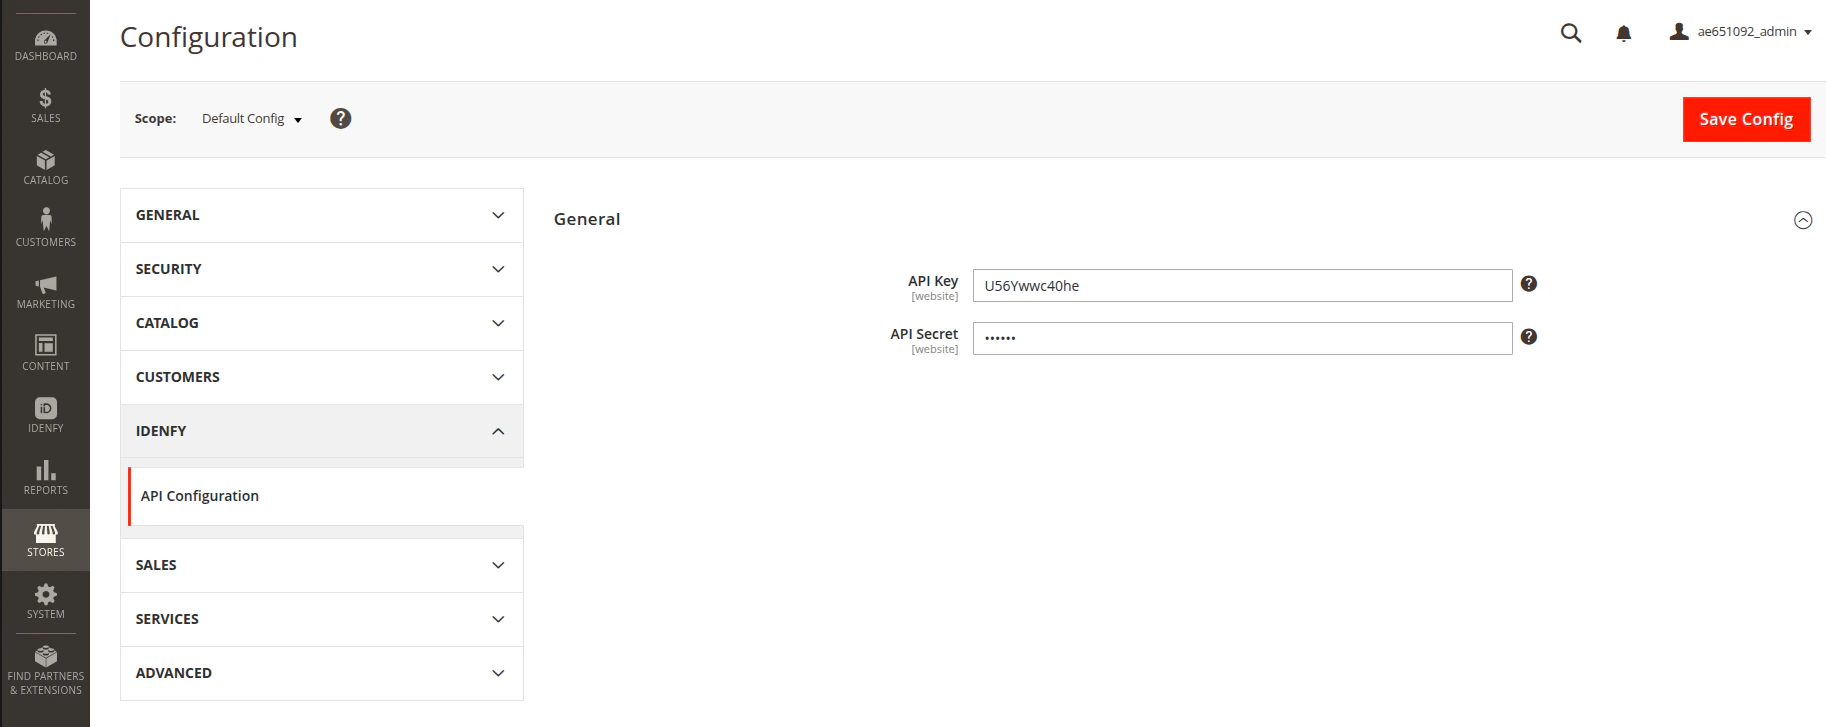
Go to the configuration section (**Stores > Configuration > IDENFY > API configuration**) and enter your [API credentials](/guides/dashboard/settings/api-keys) and save them.
 ### Configure Webhook Notifications
Go to the iDenfy admin dashboard (**Settings > System notifications**) and set up the callback URL for your store.
### Configure Webhook Notifications
Go to the iDenfy admin dashboard (**Settings > System notifications**) and set up the callback URL for your store.
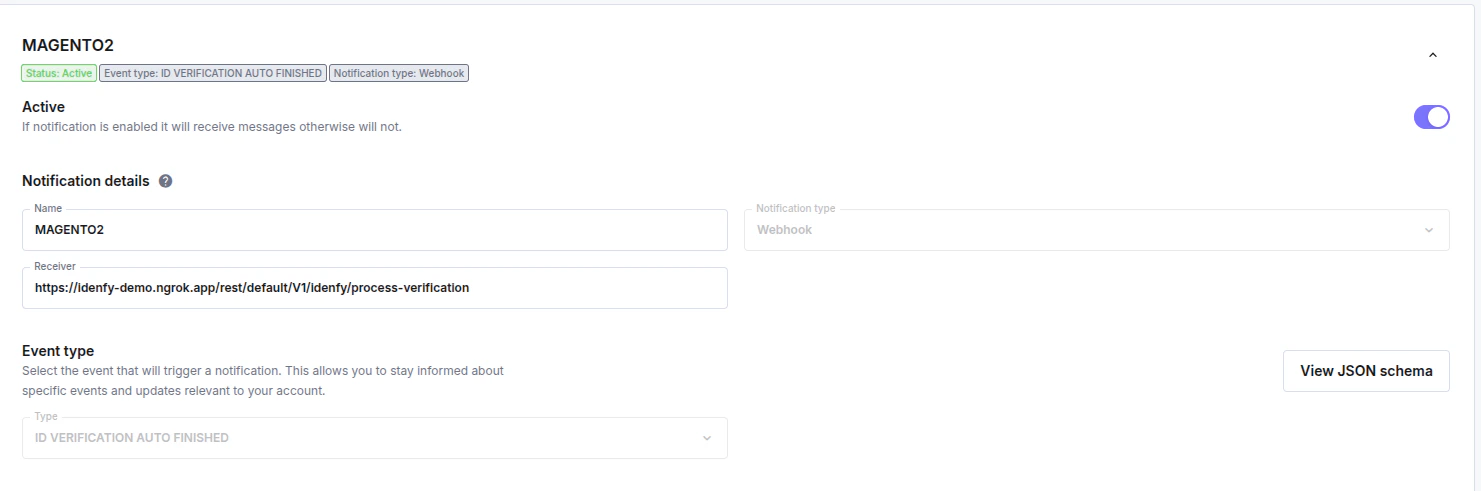 * **Notification type:** `Webhook`
* **Receiver:** `https:///rest/default/V1/idenfy/process-verification`
* **Type:** `ID_VERIFICATION_AUTO_FINISHED`
If you want to set up manual verification, create the same notification with the `ID_VERIFICATION_MANUAL_FINISHED` type.
### Verify the Integration
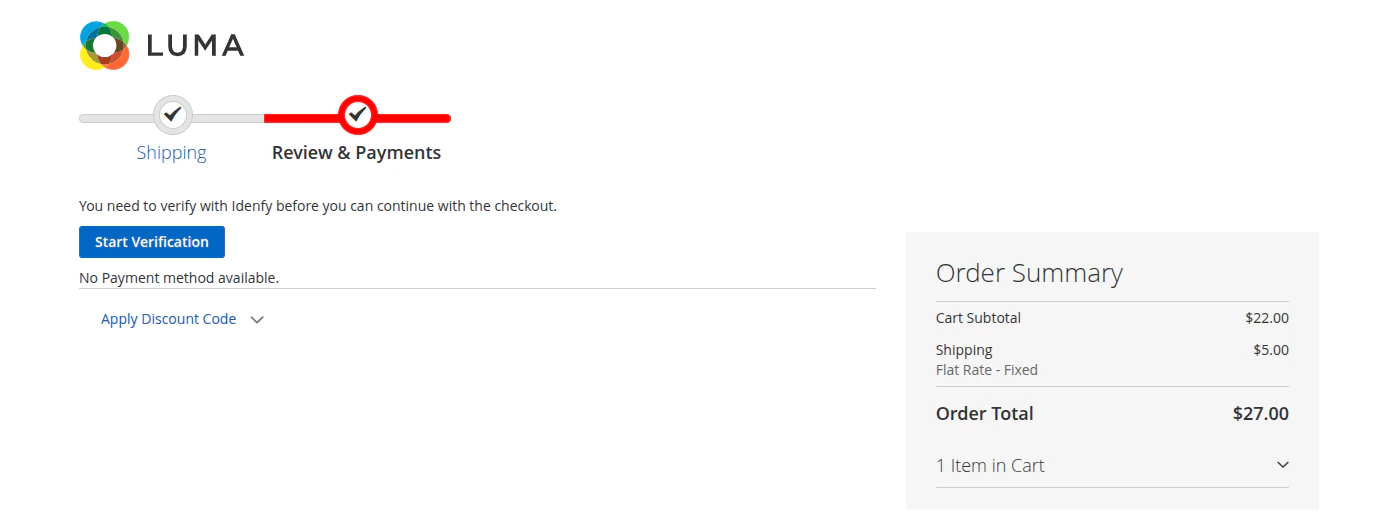
After successfully setting up webhook notifications and saving the API credentials, your customers should see the verification button and be able to perform identity verification before paying for the order.
* **Notification type:** `Webhook`
* **Receiver:** `https:///rest/default/V1/idenfy/process-verification`
* **Type:** `ID_VERIFICATION_AUTO_FINISHED`
If you want to set up manual verification, create the same notification with the `ID_VERIFICATION_MANUAL_FINISHED` type.
### Verify the Integration
After successfully setting up webhook notifications and saving the API credentials, your customers should see the verification button and be able to perform identity verification before paying for the order.
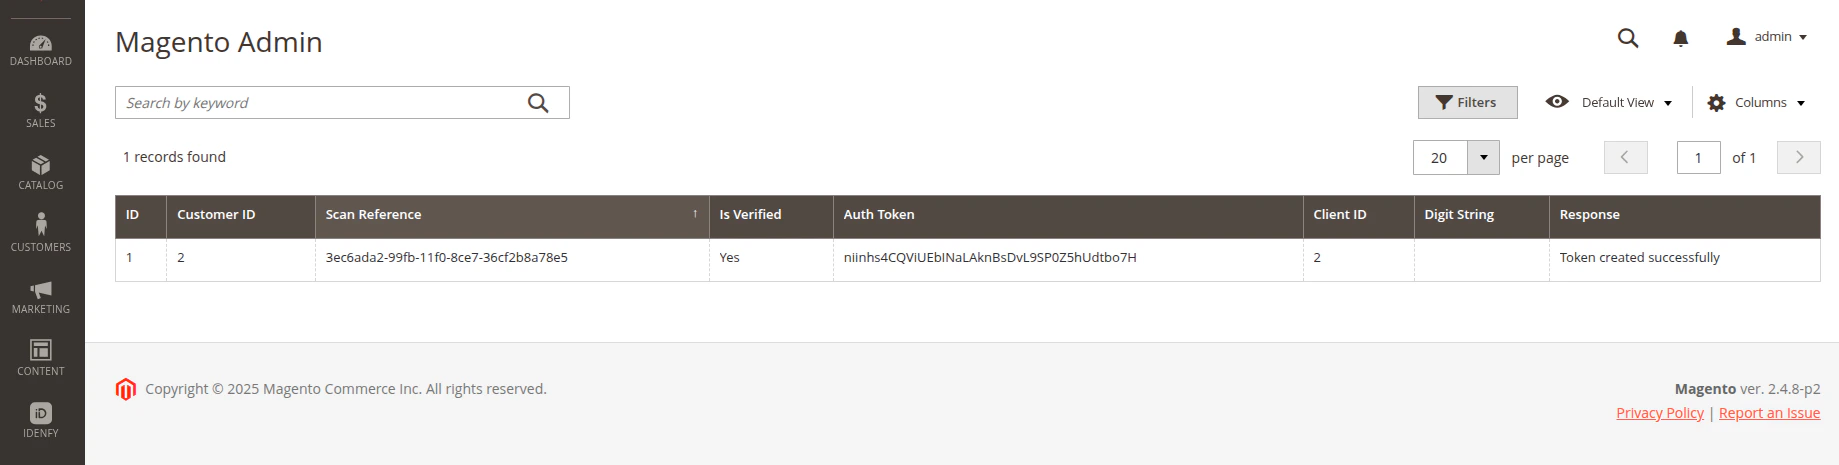
 All customer verifications will be visible in **IDENFY > Idenfy Customer Verification**.