> ## Documentation Index
> Fetch the complete documentation index at: https://documentation.idenfy.com/llms.txt
> Use this file to discover all available pages before exploring further.
# WooCommerce
> Install and configure the iDenfy identity verification plugin for WooCommerce with step-by-step setup, configuration, and usage guides.
This guide explains how to connect and set up iDenfy with WooCommerce. Below you will find step-by-step instructions on how to use the iDenfy plugin.
Before using the iDenfy plugin, you must first [install WooCommerce](https://woocommerce.com/document/installing-uninstalling-woocommerce/), as it is a required component.
## iDenfy Plugin
### Download the Plugin
Download the plugin from the provided .zip file or find the plugin in the official WordPress and WooCommerce stores and install it from there.
[Download the plugin zip file](https://drive.google.com/file/d/1MeFQLlWwxhu-niLPwG919fEtCgRwwgUM/view).
You will be navigated to Google Drive where you can click the **Download** button at the top right corner to start downloading. Once the download is finished, you will need the file for plugin installation during the next steps.
### Install the Plugin
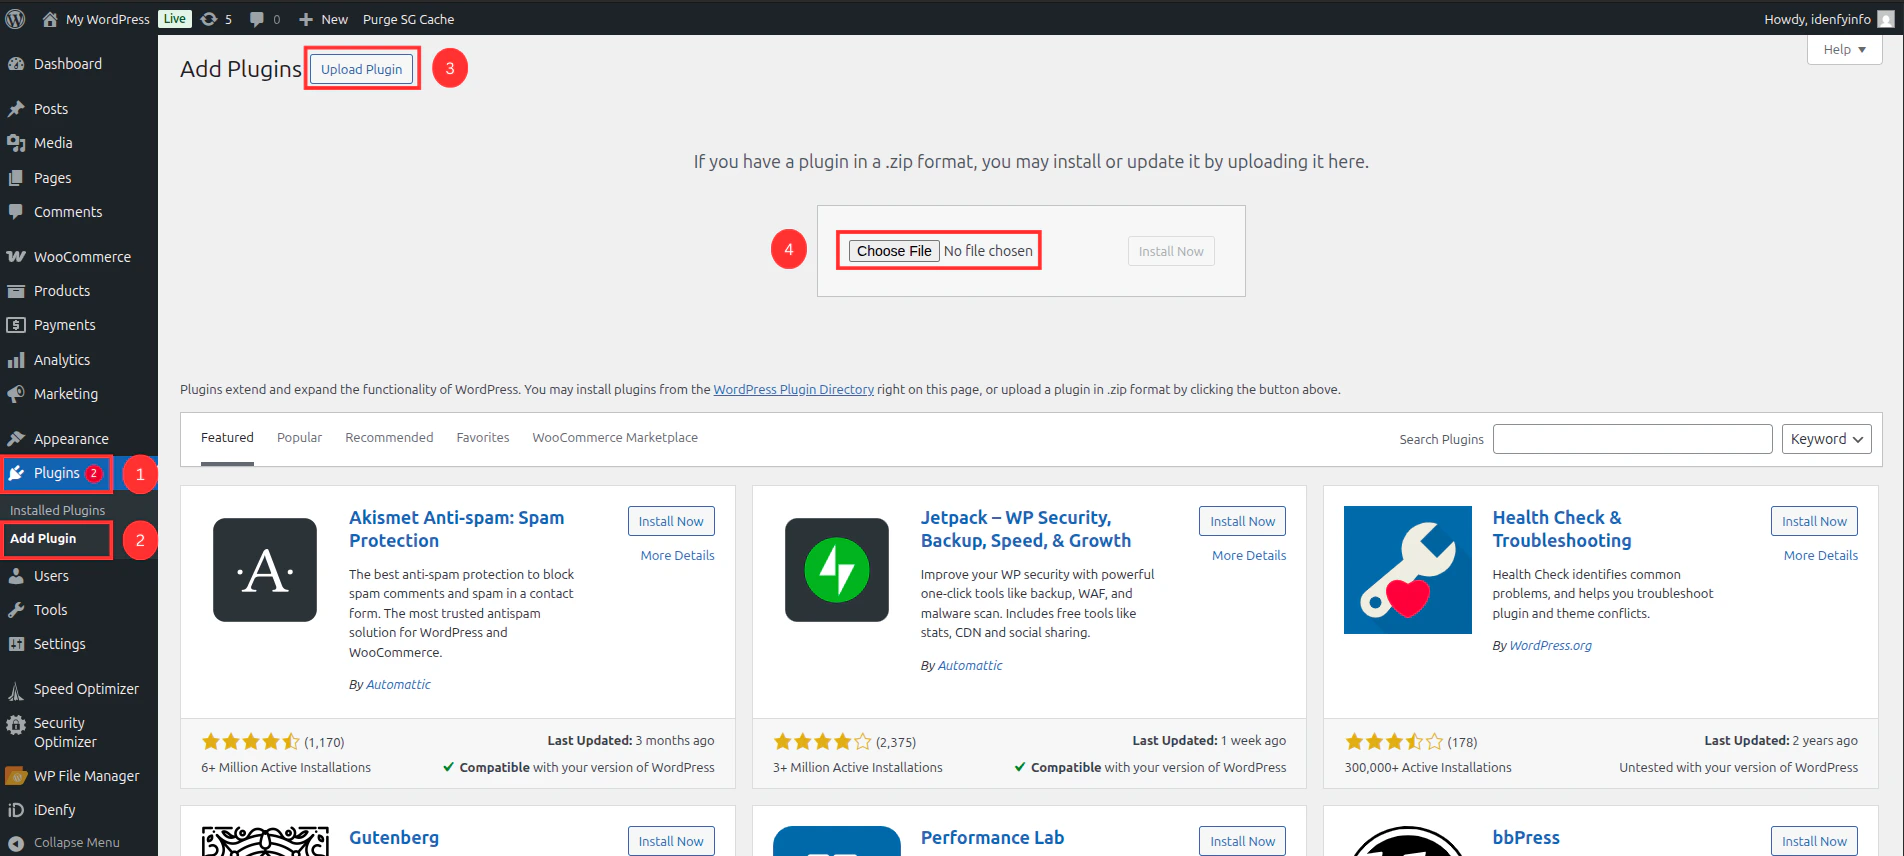
**Install the plugin:** Locate the file that was downloaded and upload it via **Plugins > Add New > Upload Plugin** in your WordPress admin panel.
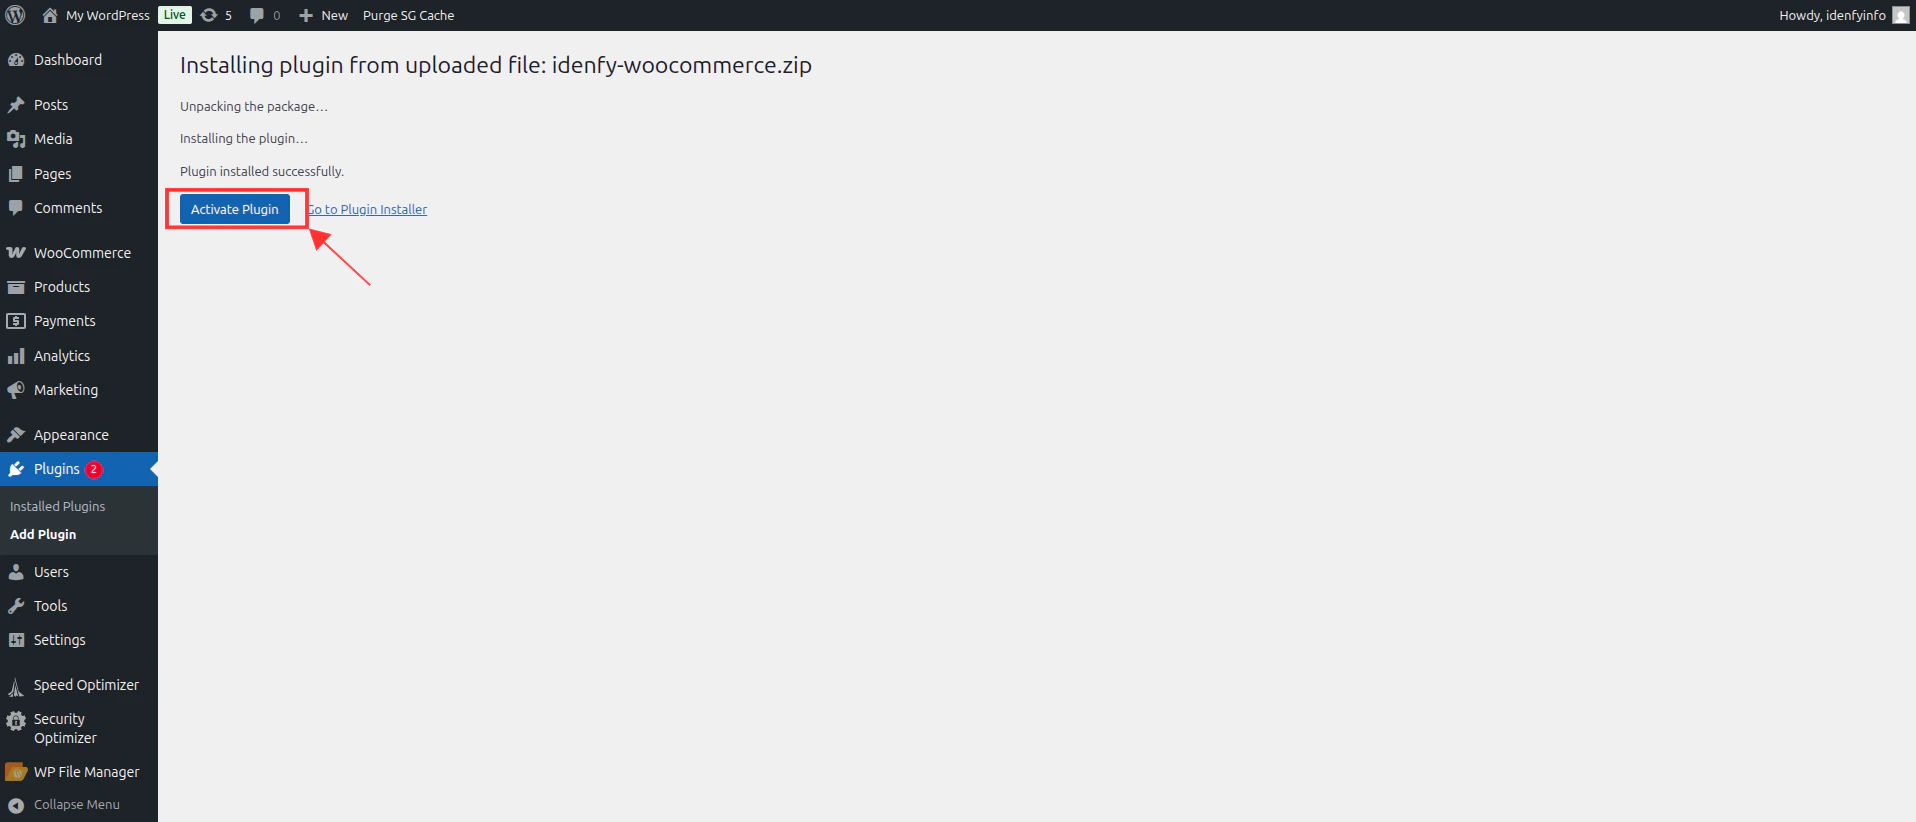
 **Activate the plugin:** After installation, activate the plugin.
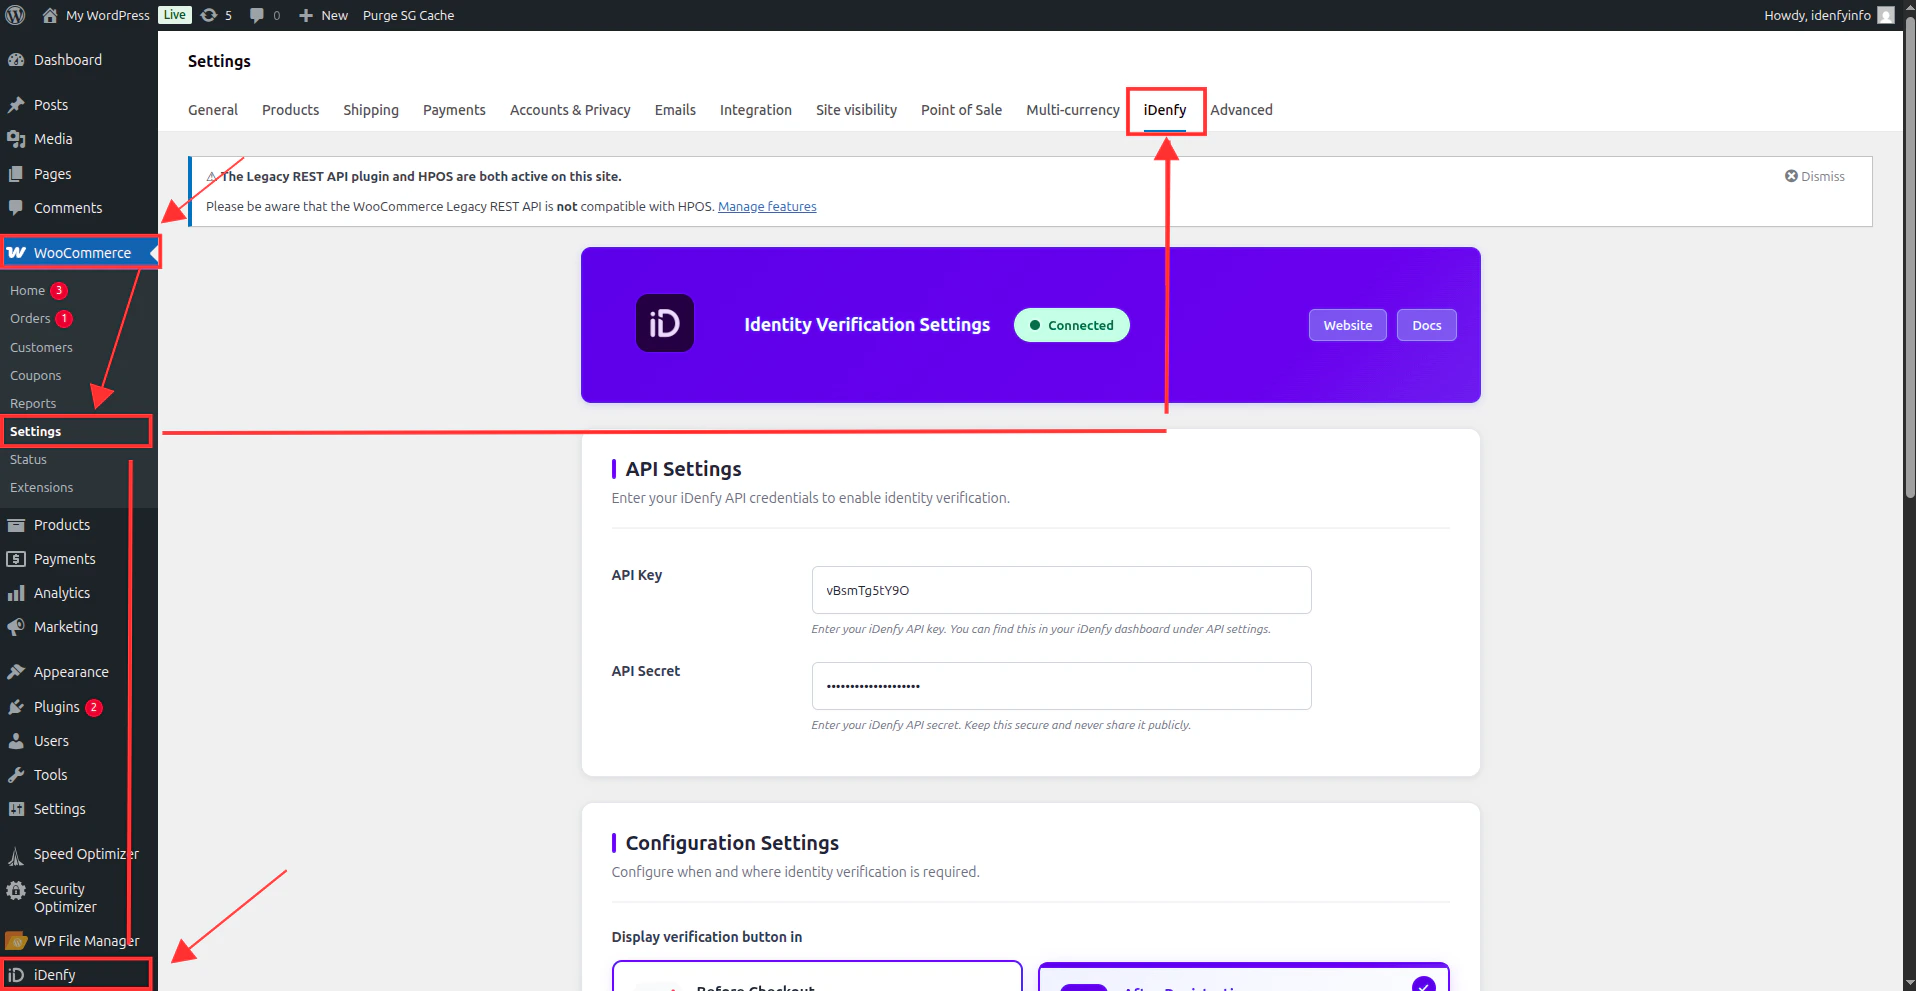
 **Manage settings:** Navigate to **WooCommerce > Settings > Idenfy**.
 ### Configure Main Settings
#### API Settings
### Configure Main Settings
#### API Settings
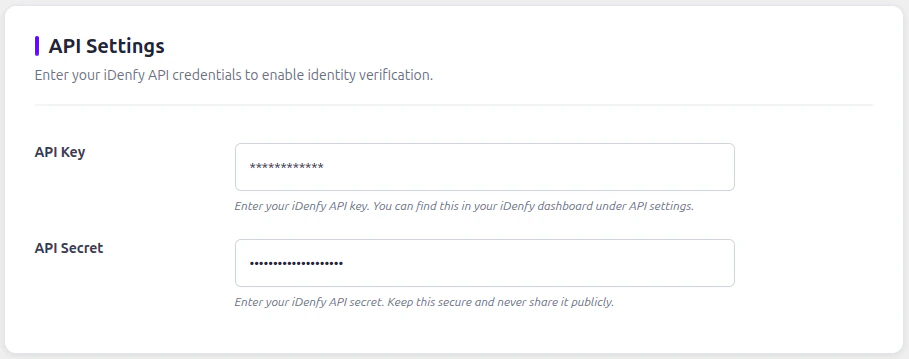 Provide your [iDenfy API credentials](/guides/dashboard/settings/api-keys) to enable the plugin.
#### Configuration Settings
Provide your [iDenfy API credentials](/guides/dashboard/settings/api-keys) to enable the plugin.
#### Configuration Settings
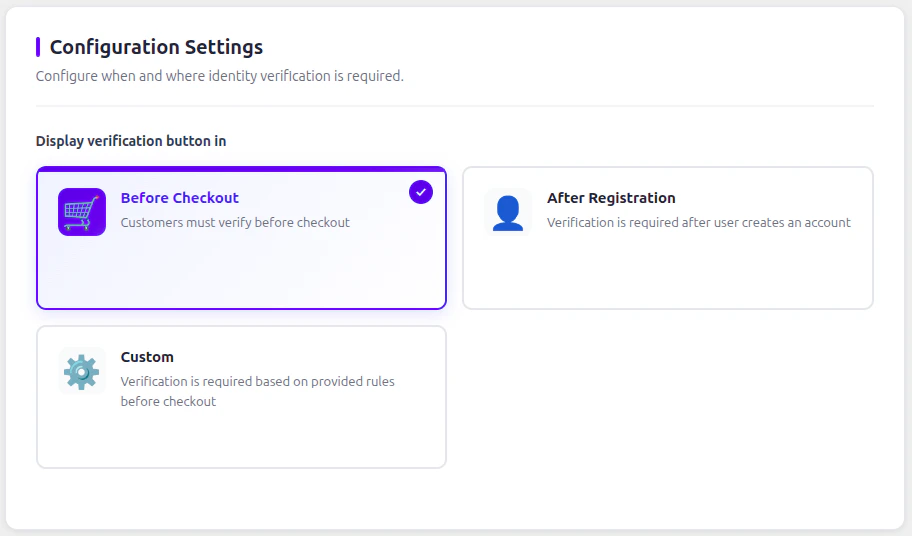 Select the flow that best suits your business logic:
| Flow | Description |
| ---------------------------------- | --------------------------------------------------------------------------------------------------------------------------------------------------------------------------------------------------------------------------------- |
| Before checkout | The plugin shows the verification modal to the user before they enter the checkout page and process the order. |
| After registration | The plugin shows the verification modal to the user after they register on the /my-account page. |
| After registration in landing page | Works the same as Before checkout flow, but only follows the rules set by an admin. Verification can be forced if a custom cart threshold is met or the customer has specific products/categories/tags that require verification. |
#### General Settings
Select the flow that best suits your business logic:
| Flow | Description |
| ---------------------------------- | --------------------------------------------------------------------------------------------------------------------------------------------------------------------------------------------------------------------------------- |
| Before checkout | The plugin shows the verification modal to the user before they enter the checkout page and process the order. |
| After registration | The plugin shows the verification modal to the user after they register on the /my-account page. |
| After registration in landing page | Works the same as Before checkout flow, but only follows the rules set by an admin. Verification can be forced if a custom cart threshold is met or the customer has specific products/categories/tags that require verification. |
#### General Settings
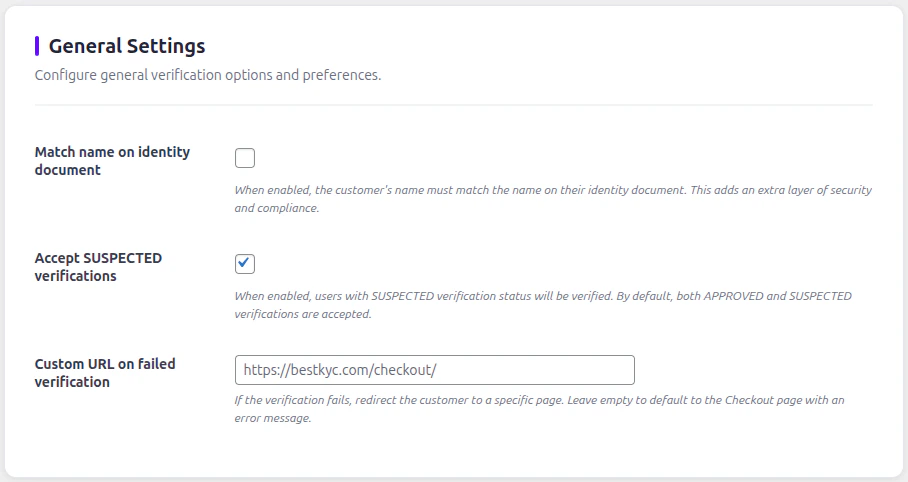 | Setting | Description |
| --------------------------------- | ----------------------------------------------------------------------------------------------------------------------------------------------------------------------- |
| Match name on identity document | Adds a constraint for matching the customer's name and surname provided in your store to the verification service. Adds an extra layer of security. |
| Accept SUSPECTED verifications | Some verifications can be marked as SUSPECTED. Enabled by default to allow SUSPECTED customers to shop, however the order status will be marked as Suspected by iDenfy. |
| Custom URL on failed verification | Provide a custom URL to redirect customers that fail verification. Can be used to provide instructions or contact information. |
**Match name on identity document** should be **turned off** if the verification button display is set to "After registration", since there is no user data available to perform cross-matching.
### Manage Users in WordPress Panel
You can check and manage all users and their statuses by navigating to **Users > All Users**. You will find an **iDenfy Verification** column with the status of each user.
| Setting | Description |
| --------------------------------- | ----------------------------------------------------------------------------------------------------------------------------------------------------------------------- |
| Match name on identity document | Adds a constraint for matching the customer's name and surname provided in your store to the verification service. Adds an extra layer of security. |
| Accept SUSPECTED verifications | Some verifications can be marked as SUSPECTED. Enabled by default to allow SUSPECTED customers to shop, however the order status will be marked as Suspected by iDenfy. |
| Custom URL on failed verification | Provide a custom URL to redirect customers that fail verification. Can be used to provide instructions or contact information. |
**Match name on identity document** should be **turned off** if the verification button display is set to "After registration", since there is no user data available to perform cross-matching.
### Manage Users in WordPress Panel
You can check and manage all users and their statuses by navigating to **Users > All Users**. You will find an **iDenfy Verification** column with the status of each user.
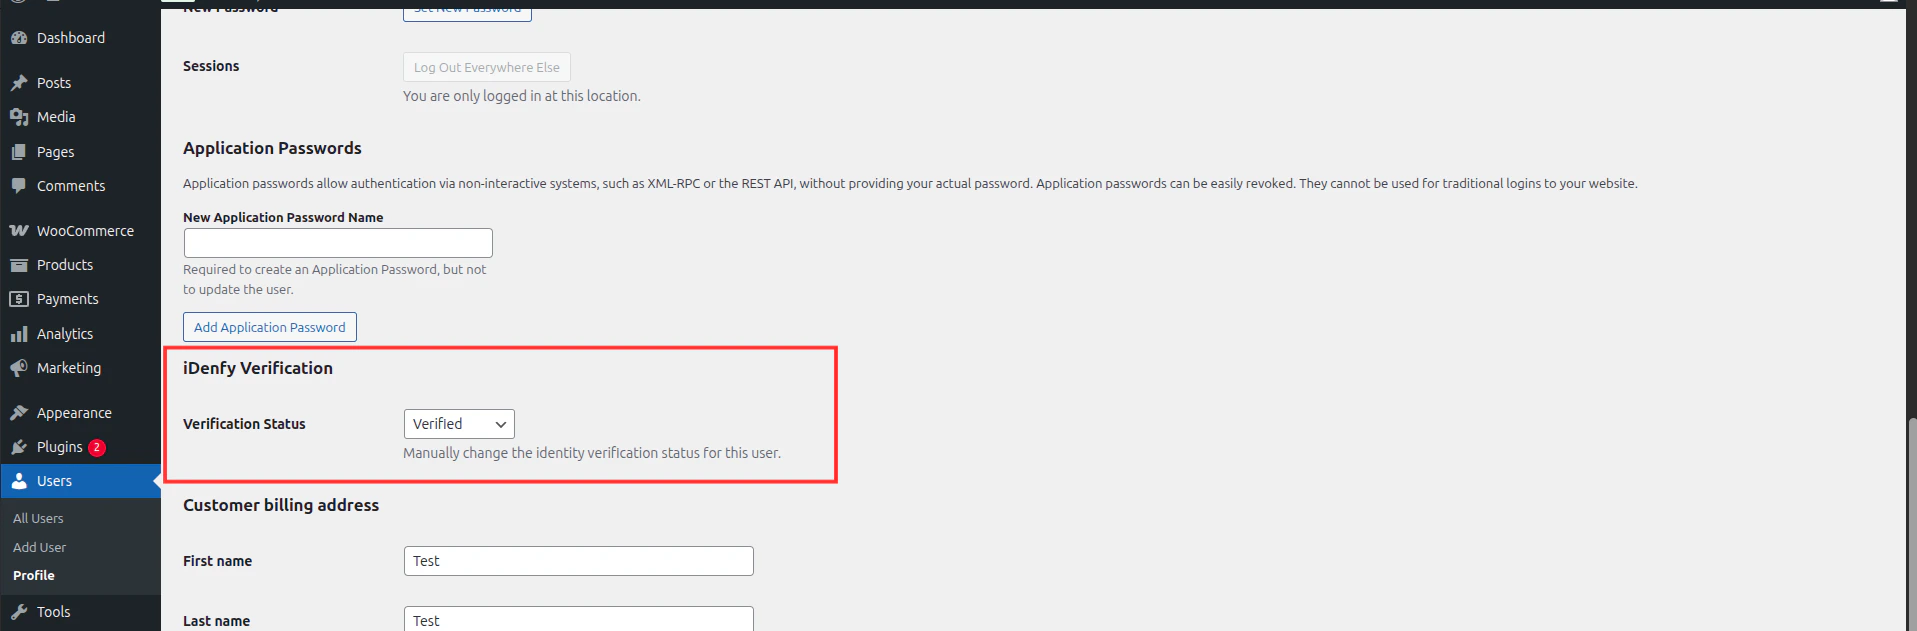
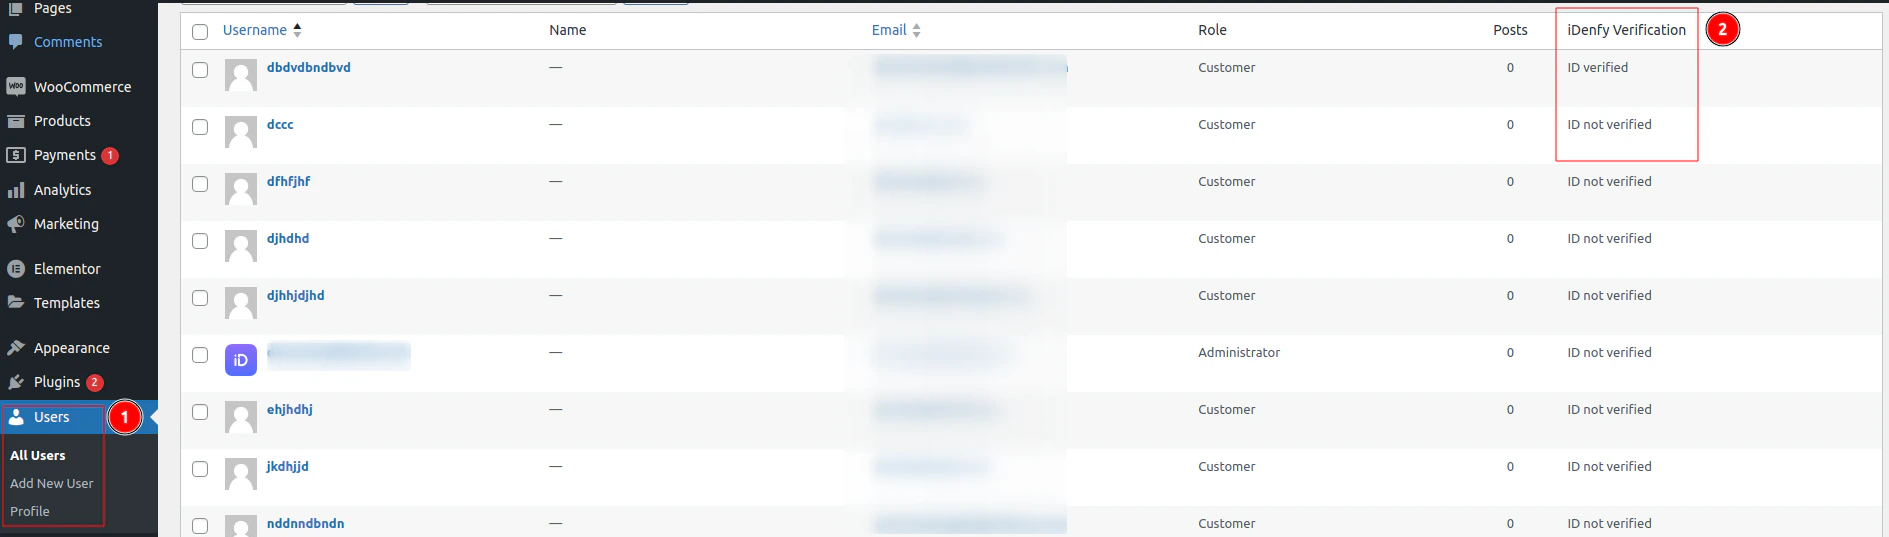 You can also manually set the verification status for each customer by selecting and editing a specific user.