iDenfy Plugin
Install and Activate the iDenfy Plugin
Log in to your WordPress panel, navigate to Plugins and search for the iDenfy plugin. Click Install Now and once it is downloaded click Activate.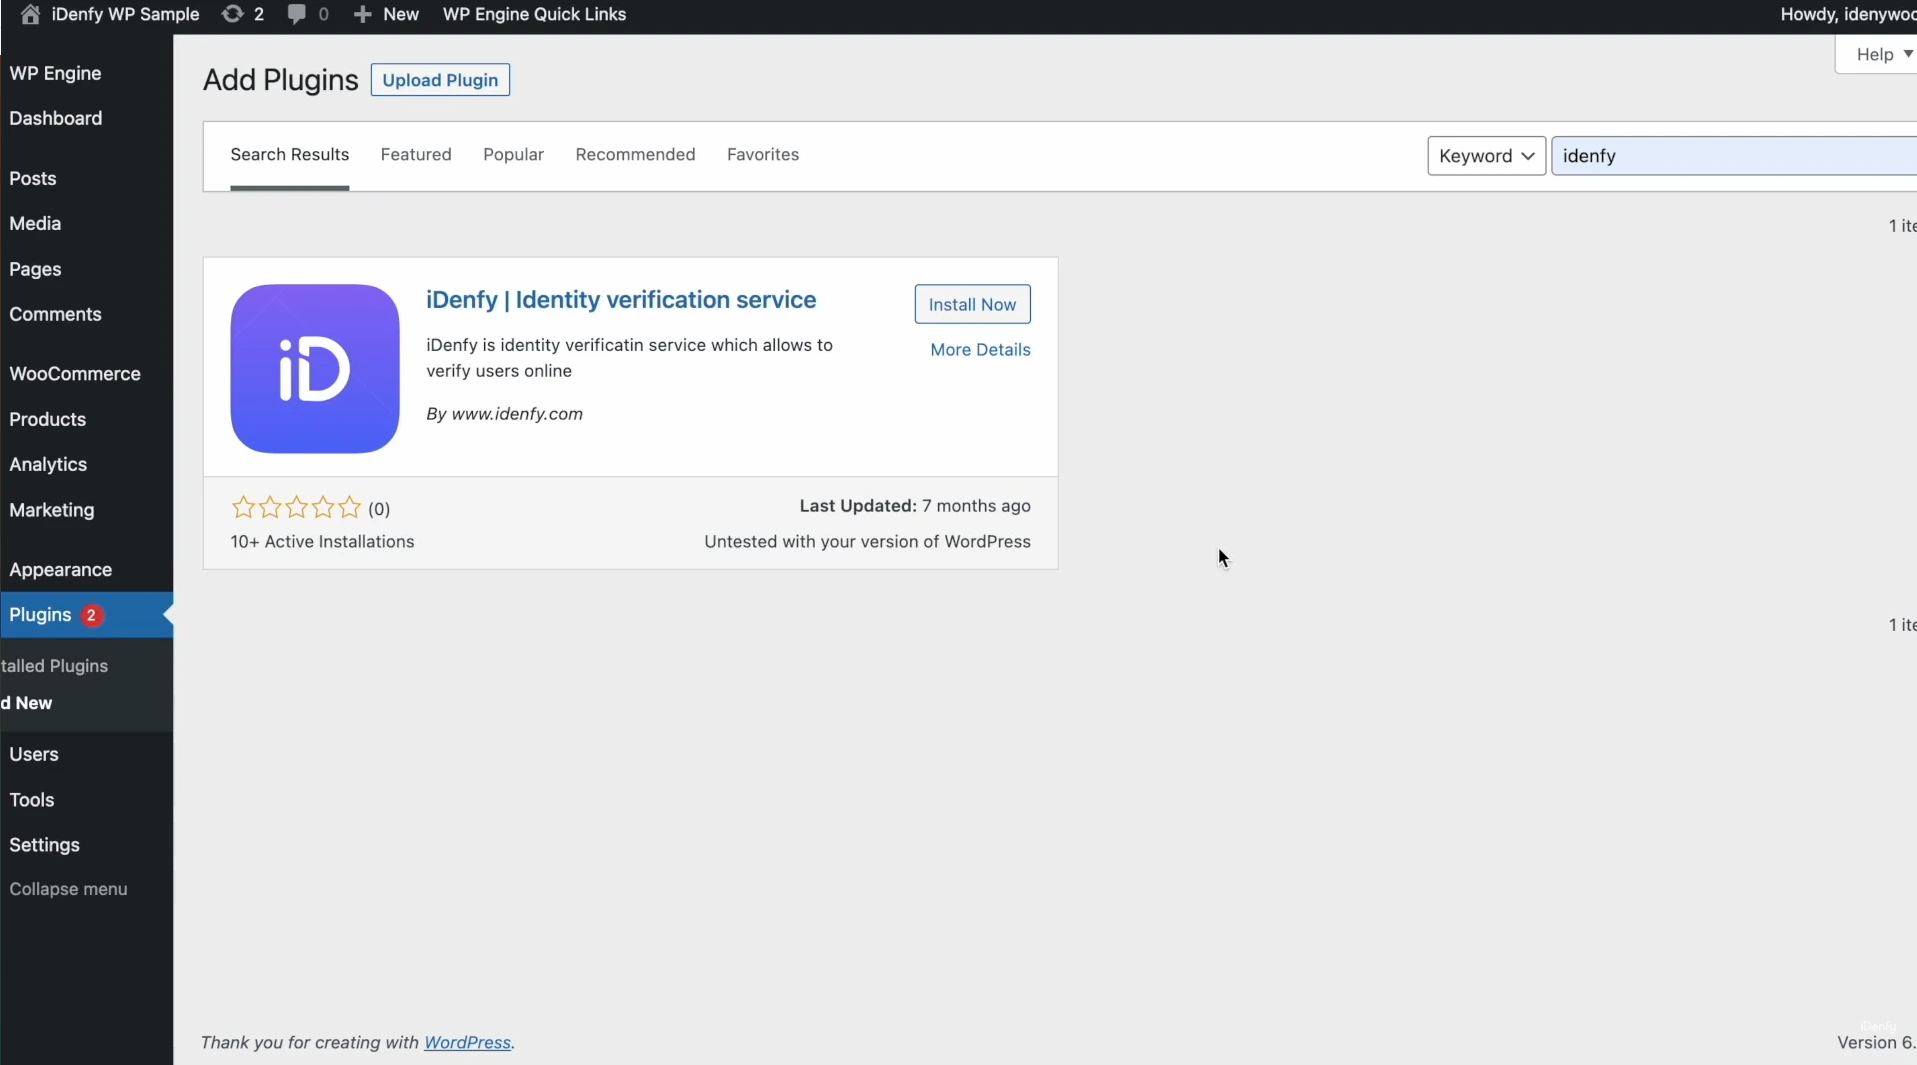
Authorize Connection
Once the plugin is activated, navigate to iDenfy > Settings.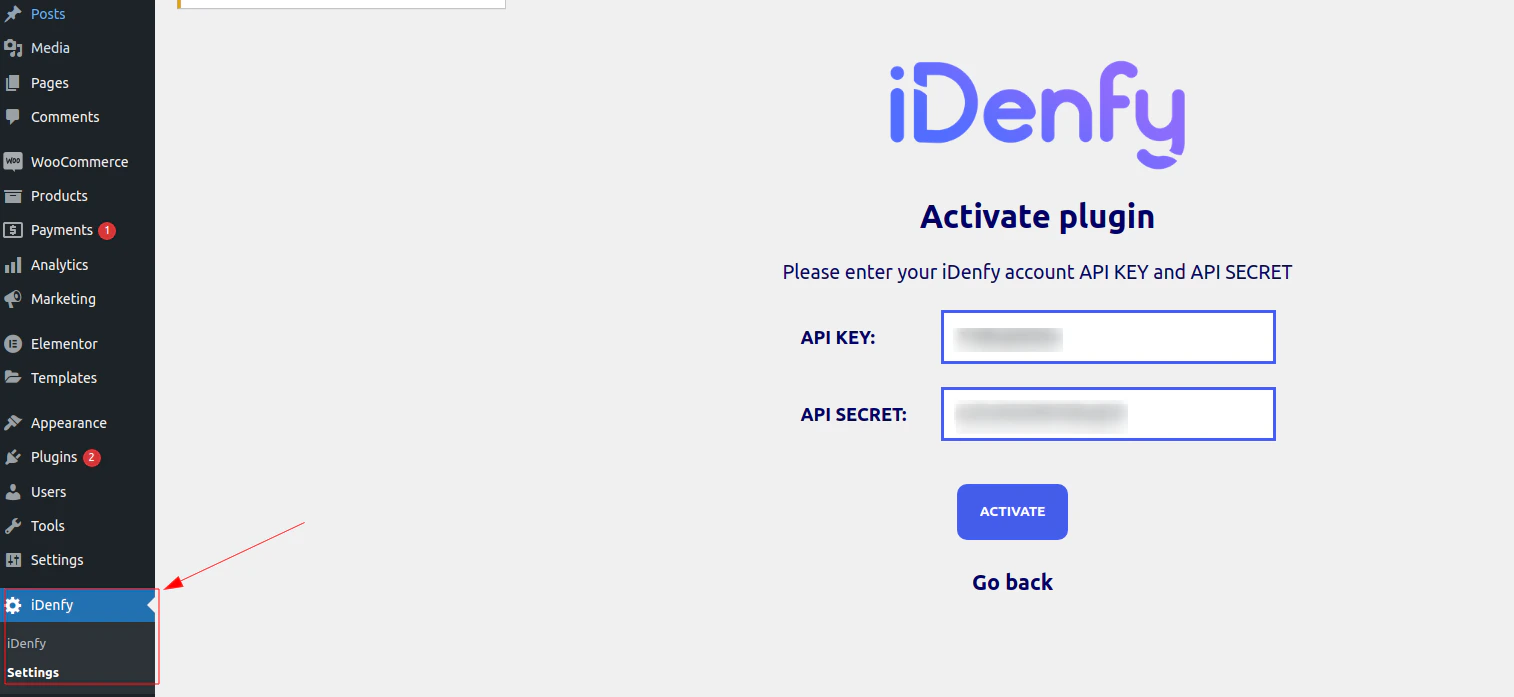
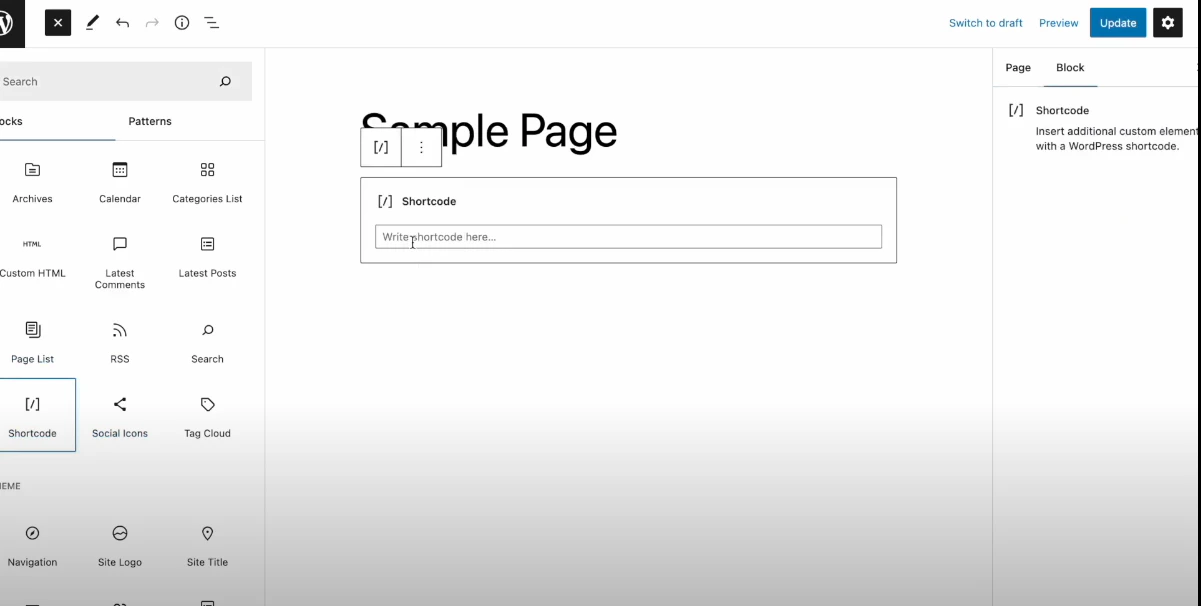
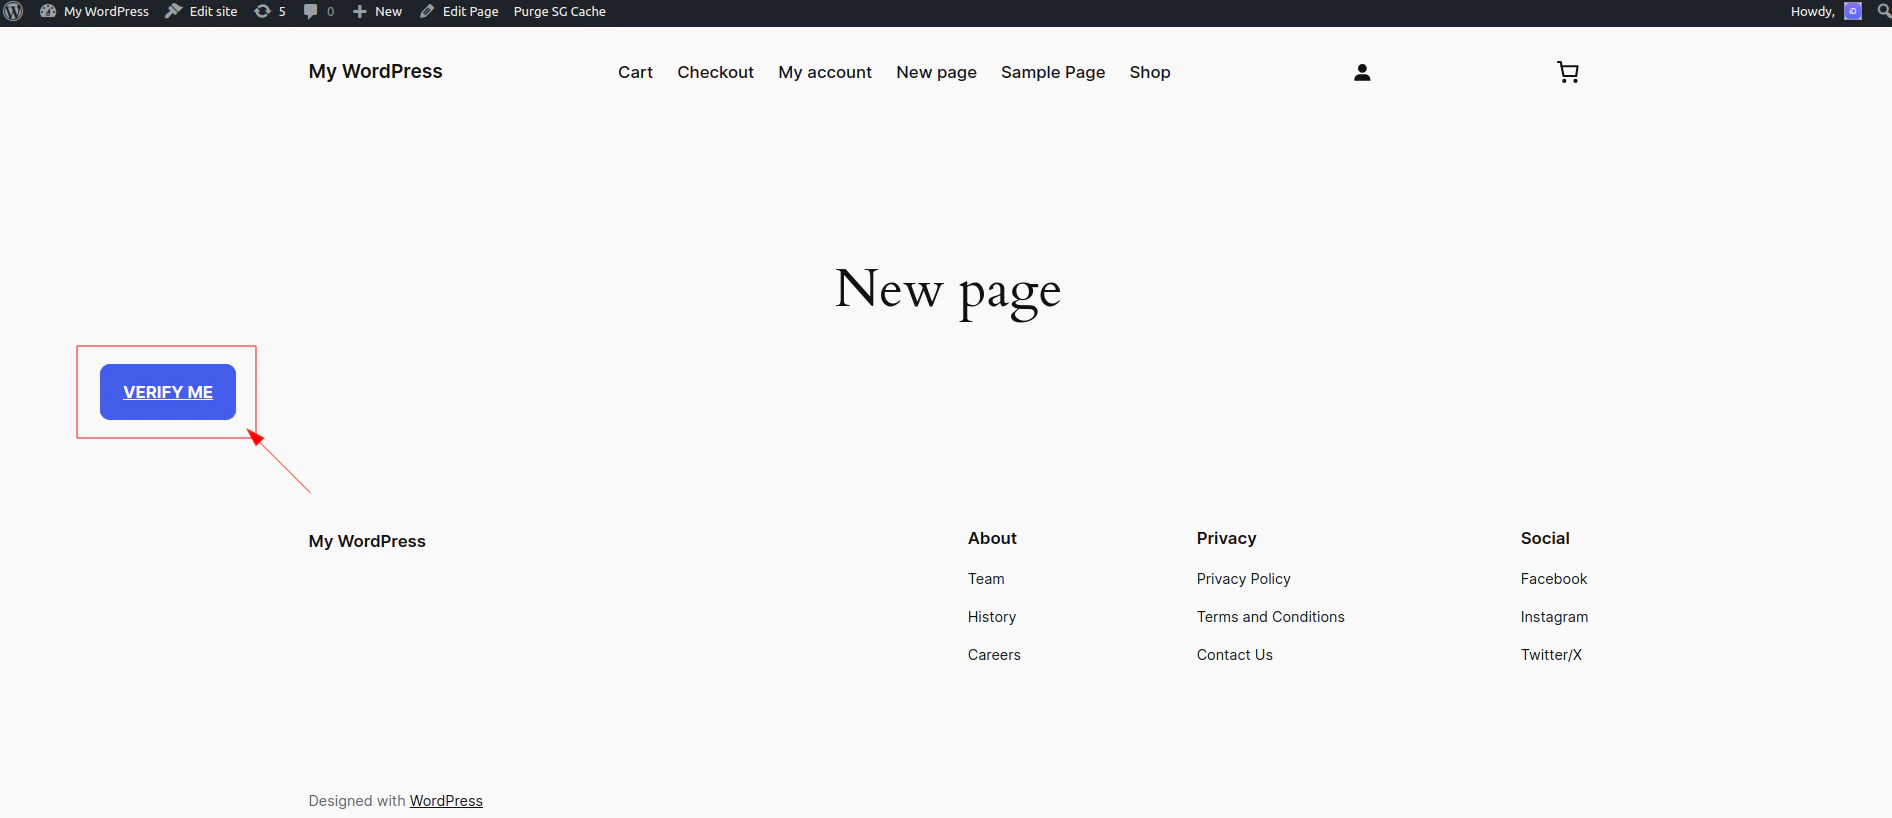
Implement the Verification Button
When the authorization step is finished, you can copy the shortcode.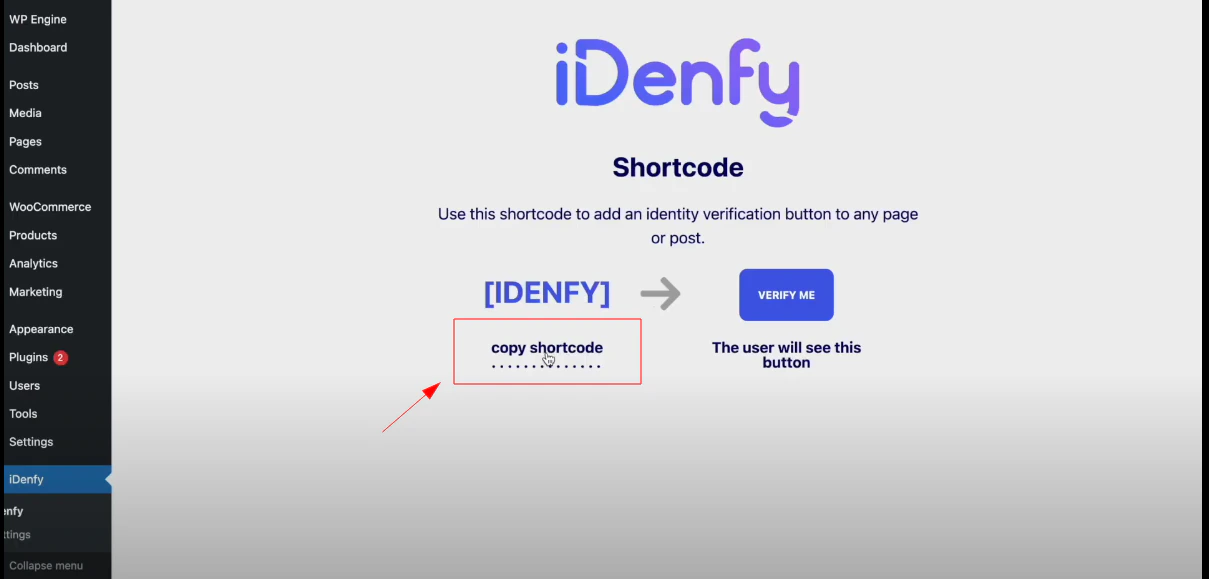
Redirect User After Verification
When verification is finished, you can redirect users to your site based on verification results (instantly after automatic check or later, after manual review). More information on how redirect works. You can configure the success and/or failed URL by navigating to Settings > Configuration > General in the dashboard.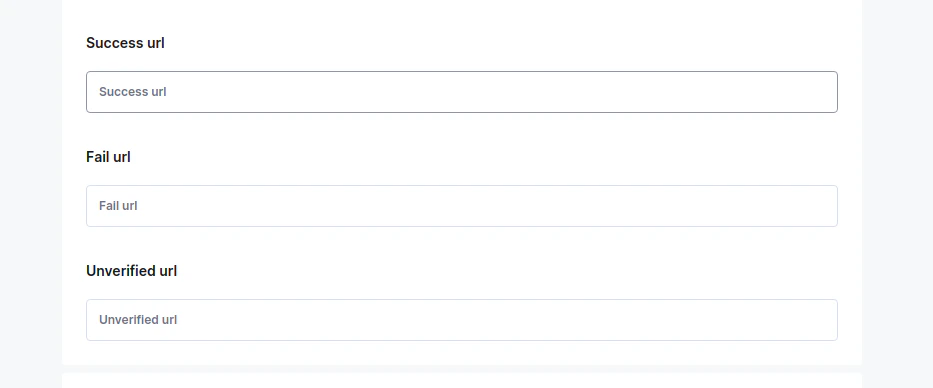
You can handle/manage users in WordPress by navigating to All users > Idenfy verifications.
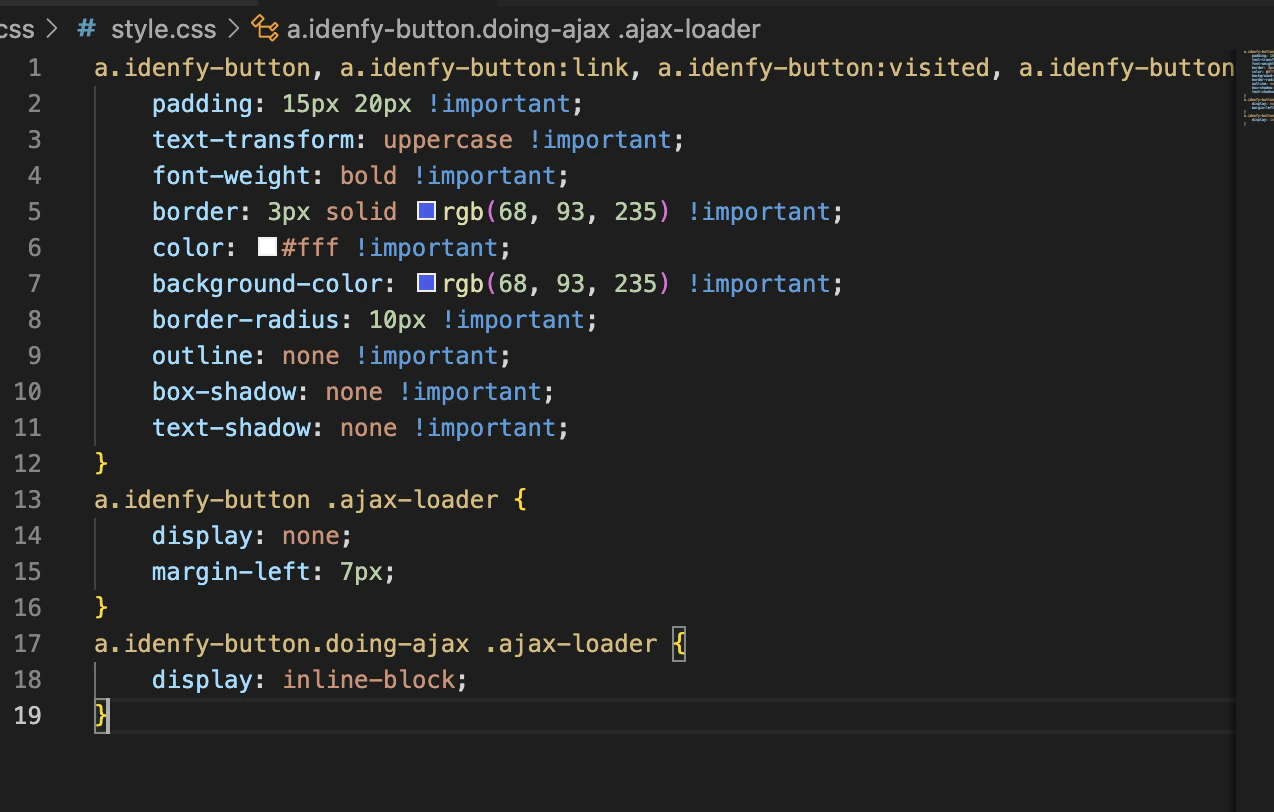
Editing Button Appearance
You can edit the appearance of the button by visiting thestyle.css of the plugin in the Plugin File Editor:
- Log in to your WordPress admin dashboard.
- Navigate to Plugins in the left-hand menu.
- Click on Plugin File Editor (or Editor).
- Select the plugin from the dropdown menu in the upper right.
- The plugin’s files will be displayed in the editor.