Purpose
Webhooks by Zapier enables seamless access to iDenfy API endpoints, requiring minimal programming knowledge. This integration supports services such as:- KYC (Know Your Customer)
- AML (Anti-Money Laundering)
- Potentially KYB (Know Your Business)
Key Concepts
Initiating KYC Verification and Receiving Results are two distinct steps. Each step involves specific API interactions outlined below.1. Creating a Verification Session
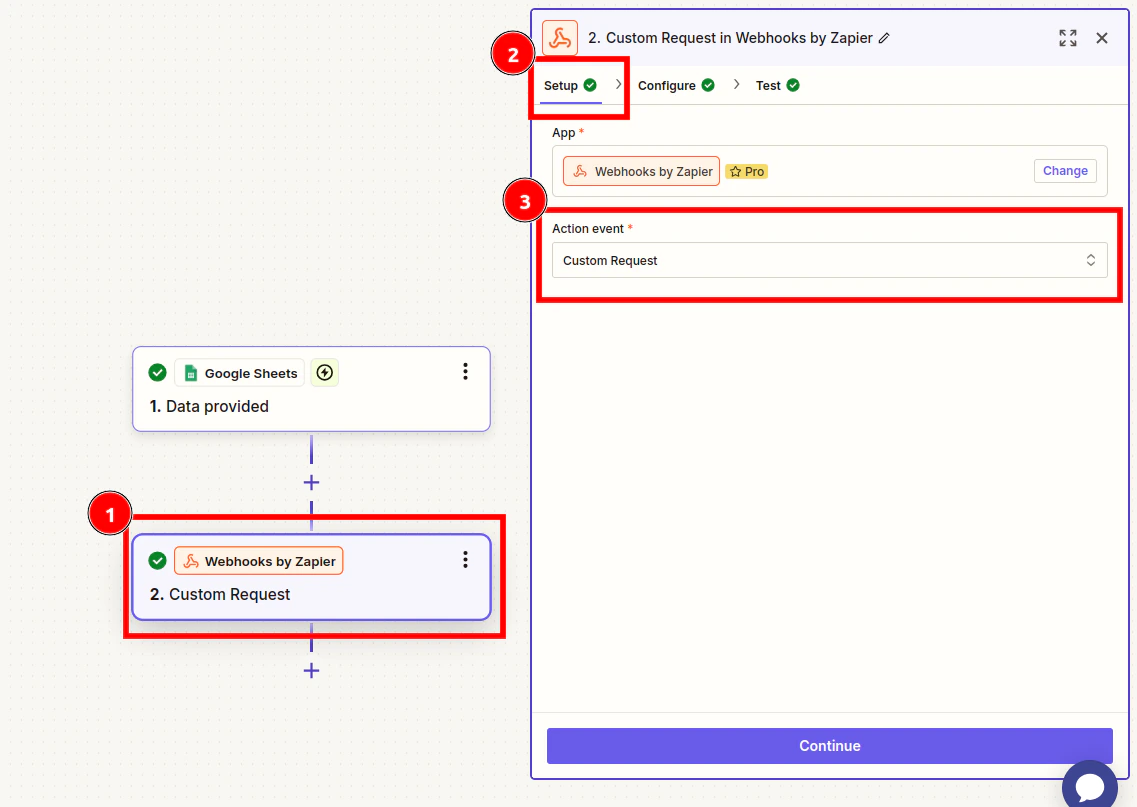
To initiate verification, you need to create a verification session using the designated API endpoint.- Set up the initial trigger in Zapier.
- Add a new action step for Webhooks by Zapier.
- App: Search for “Webhooks by Zapier.”
- Action Event: Select “Custom Request.”
- Configure the Request:
- Method: As described in the iDenfy documentation.
- URL: Enter the endpoint URL from the iDenfy documentation.
- Data: Input required parameters. You can map data from earlier steps in the Zap.
- Basic Authentication: Use your iDenfy API credentials in the format:
API Key|API Secret(e.g.,key123|secret@#$123).

- When configured successfully, this step generates a verification token.
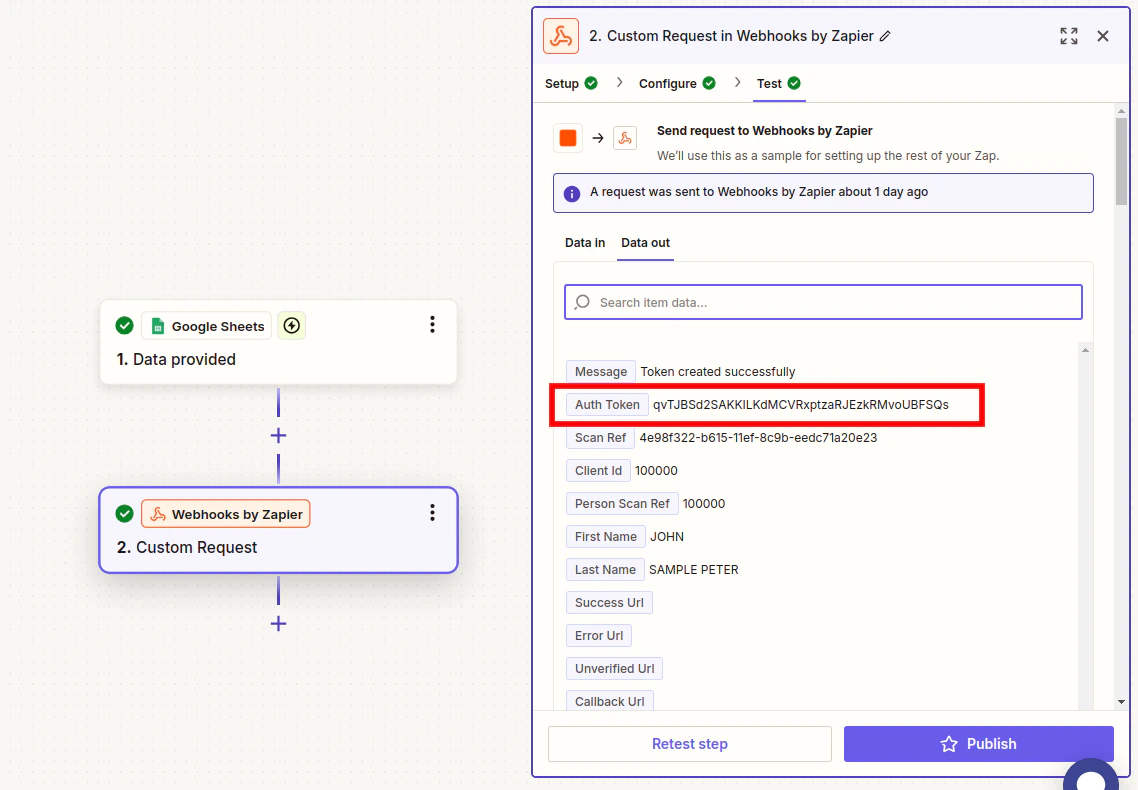
2. Generating a Verification Link
To create a unique verification link for a client:- Generated Auth Token:
qvTJBSd2SAKKILKdMCVRxptzaRJEzkRMvoUBFSQs - Append the generated Auth Token to the base URL:
https://ivs.idenfy.com/api/v2/redirect?authToken= - Example:
https://ivs.idenfy.com/api/v2/redirect?authToken=qvTJBSd2SAKKILKdMCVRxptzaRJEzkRMvoUBFSQs
Once you create this link, you can include it in automated emails, notifications, or other integrations depending on your setup.
3. Receiving Verification Results
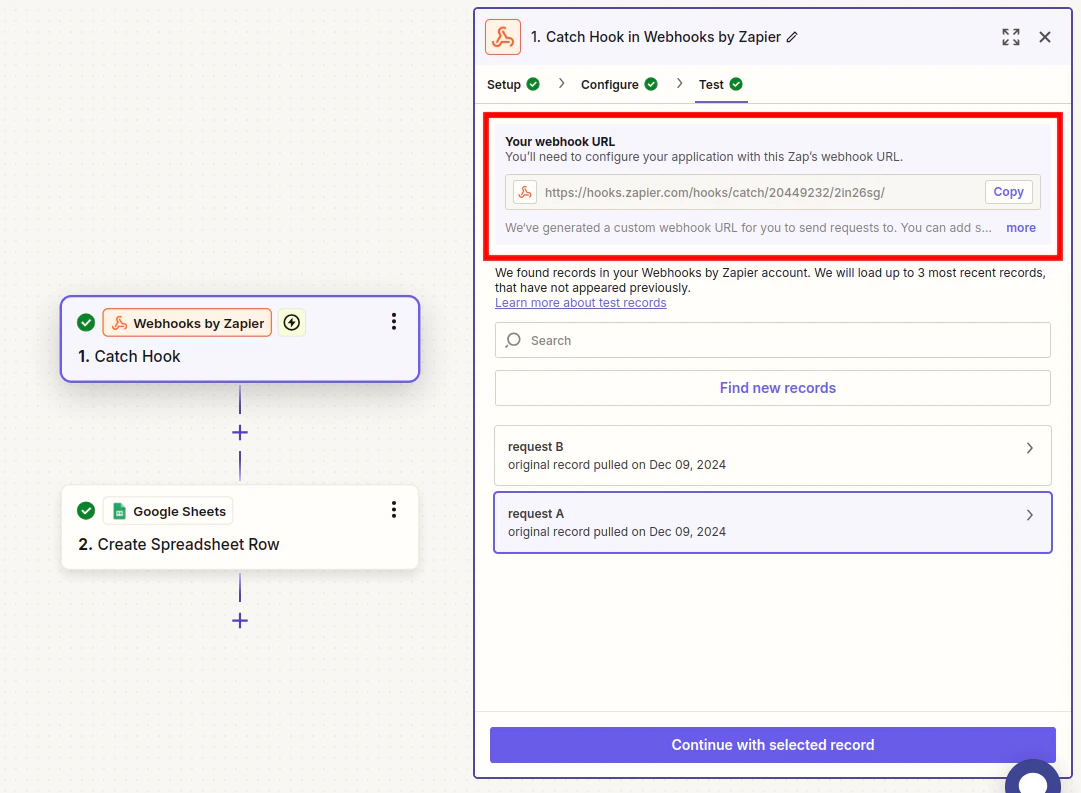
You can configure Webhooks by Zapier to receive results as notifications.- Create a New Zap and select the trigger event Catch Hook.
- In Configure, leave the Pick off a Child Key field empty.
- Copy the URL from the Your webhook URL section.
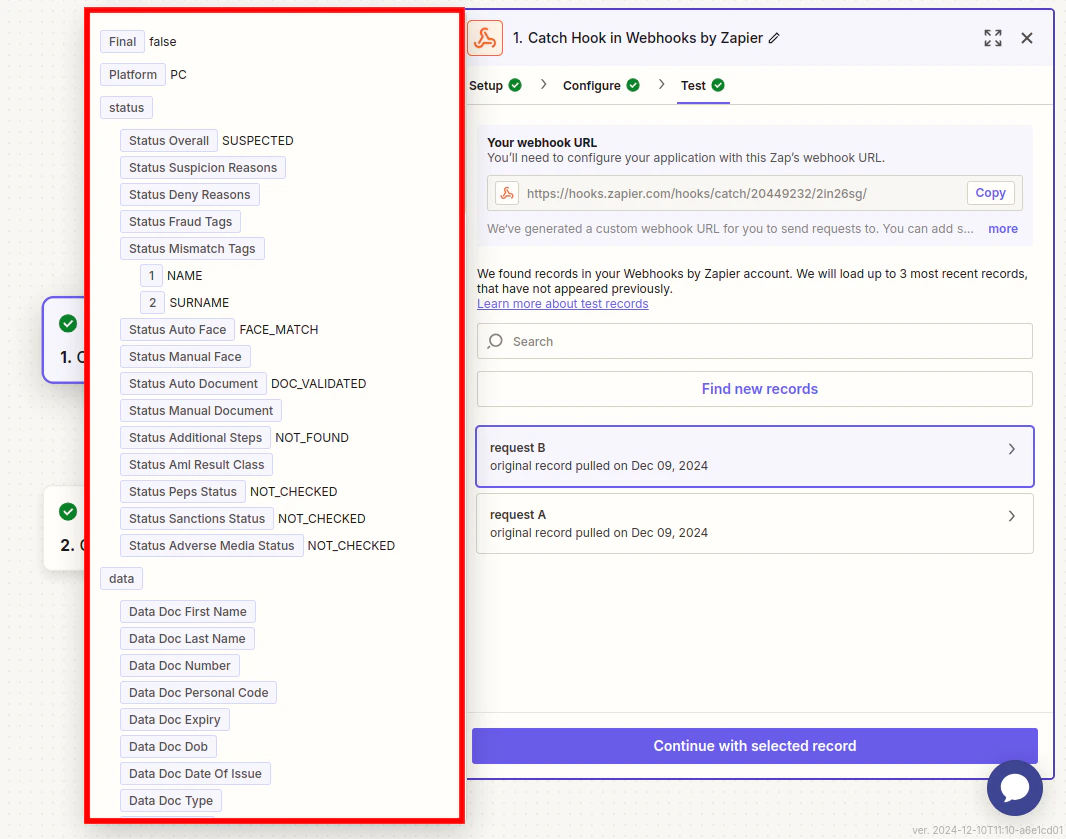
- Set up the notification in the iDenfy dashboard.
- You will receive information in parsed fields, which you can use according to your needs.
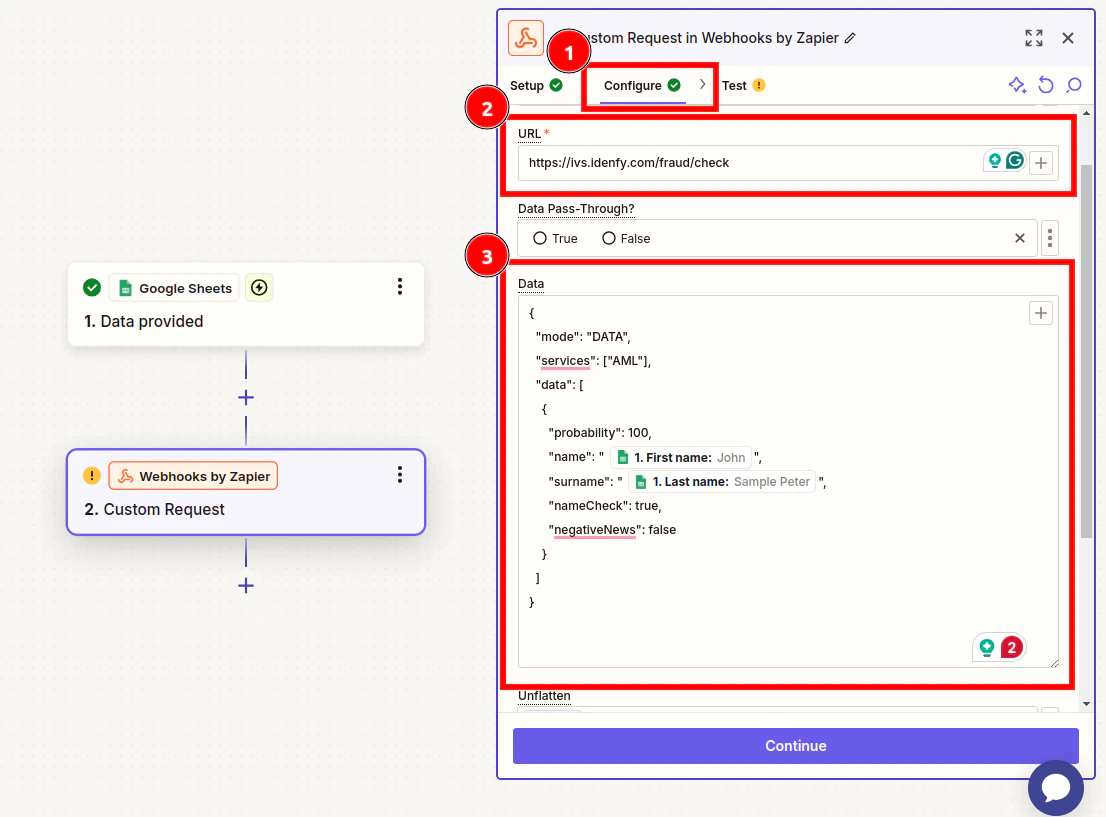
4. Using AML Services
For AML, follow the same steps as “Creating a Verification Session.”- Use the API endpoint provided in the documentation, specifically in the section about AML.
- Using the Data section from the examples in the documentation, configure the AML search to match your needs.
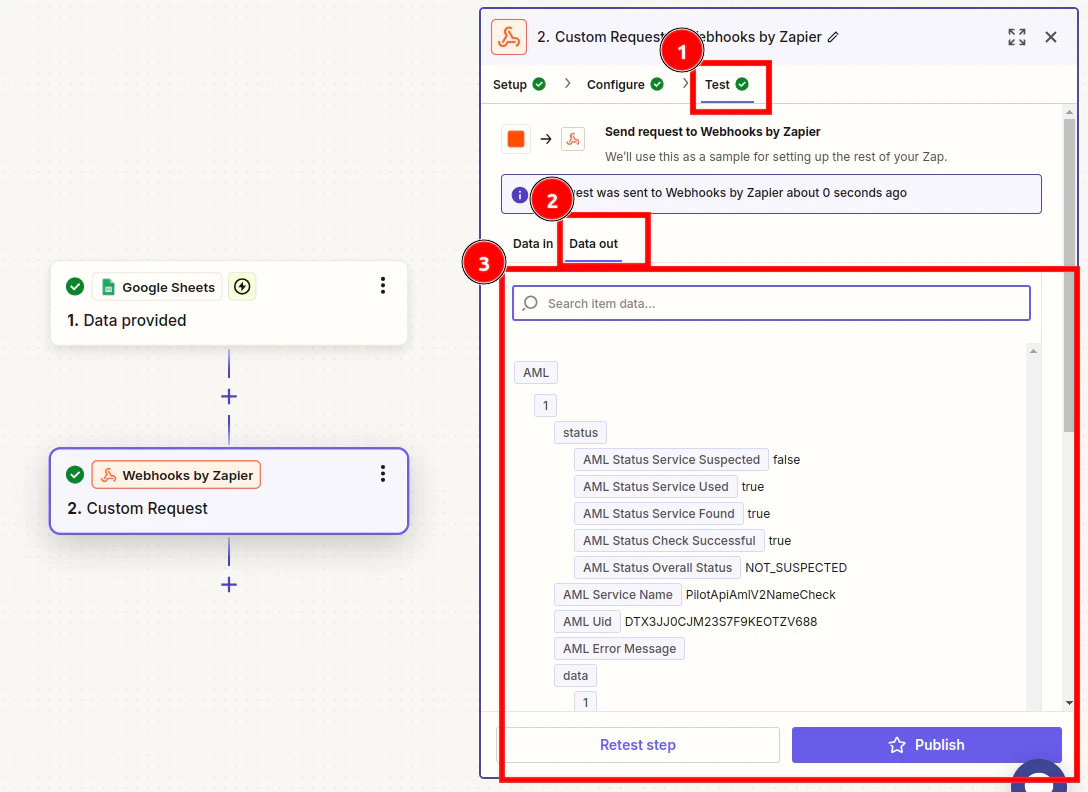
The results will be returned in the same request.
Best Practices
- Always refer to the latest iDenfy API documentation.
- Securely manage API credentials.
- Test webhook configurations thoroughly.
- Implement robust error handling.