Installation
There are two main ways to install the module:- From the Marketplace (Recommended)
- From the raw package
- Go to the Adobe Commerce Marketplace and order the free iDenfy extension. You need to be logged into your Marketplace account to complete the order.
-
Open the terminal and in your project’s directory run the following commands:
You may be prompted to enter your username and password. If so, provide your Adobe Commerce authentication keys.
-
Next, run these commands:
Configuration
Requirements:
- Live production environment (available via the Pricing page)
- API key and API secret — generated via the dashboard
- Webhook setup on the iDenfy admin dashboard
Configure API Credentials
Go to the configuration section (Stores > Configuration > IDENFY > API configuration) and enter your API credentials and save them.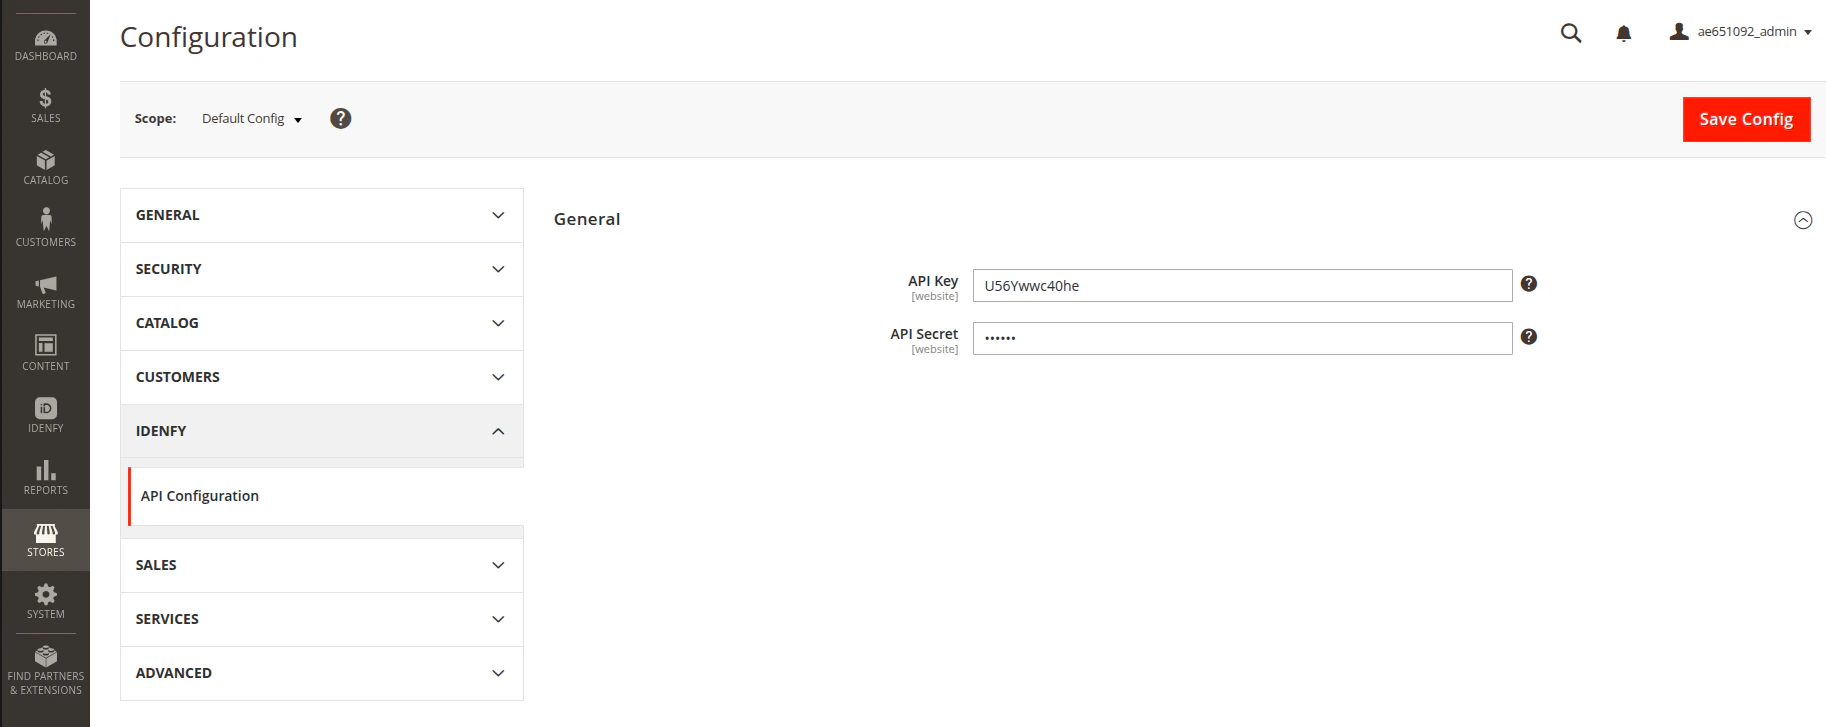
Configure Webhook Notifications
Go to the iDenfy admin dashboard (Settings > System notifications) and set up the callback URL for your store.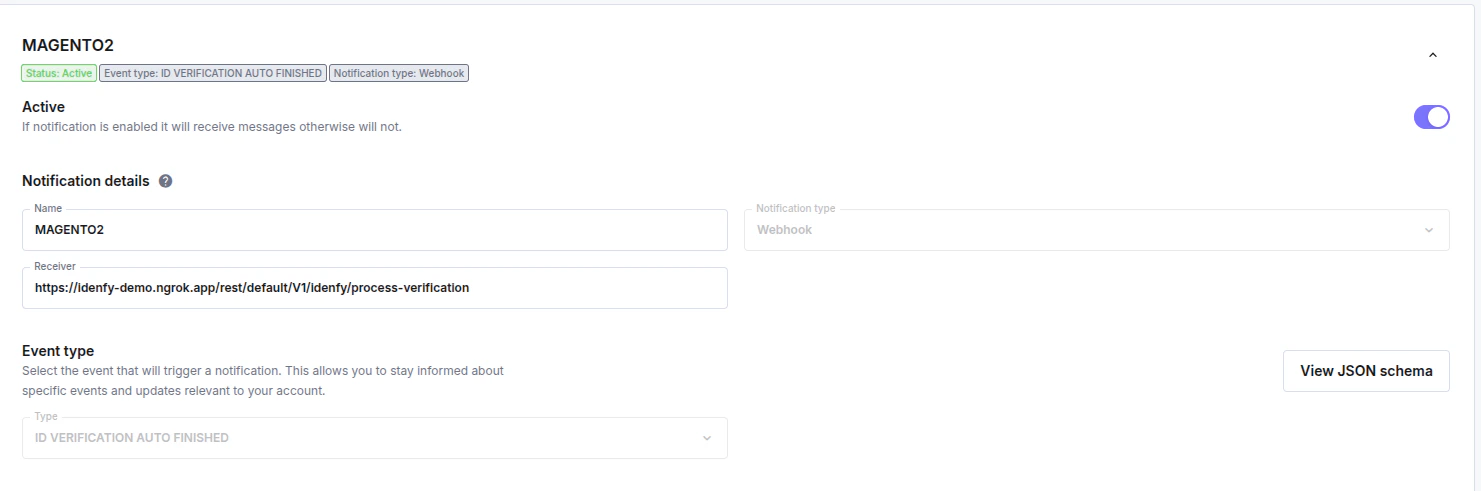
- Notification type:
Webhook - Receiver:
https://<YOUR_WEBSITE_URL>/rest/default/V1/idenfy/process-verification - Type:
ID_VERIFICATION_AUTO_FINISHED
ID_VERIFICATION_MANUAL_FINISHED type.
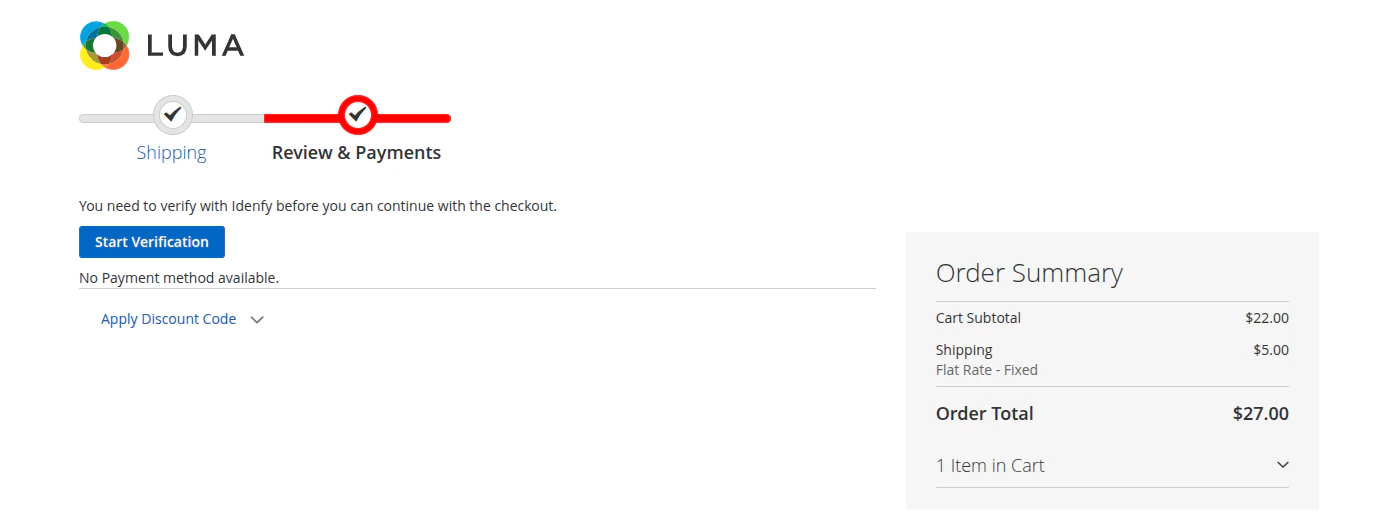
Verify the Integration
After successfully setting up webhook notifications and saving the API credentials, your customers should see the verification button and be able to perform identity verification before paying for the order.