Notification Settings
In the left sidebar, click Settings Find System notifications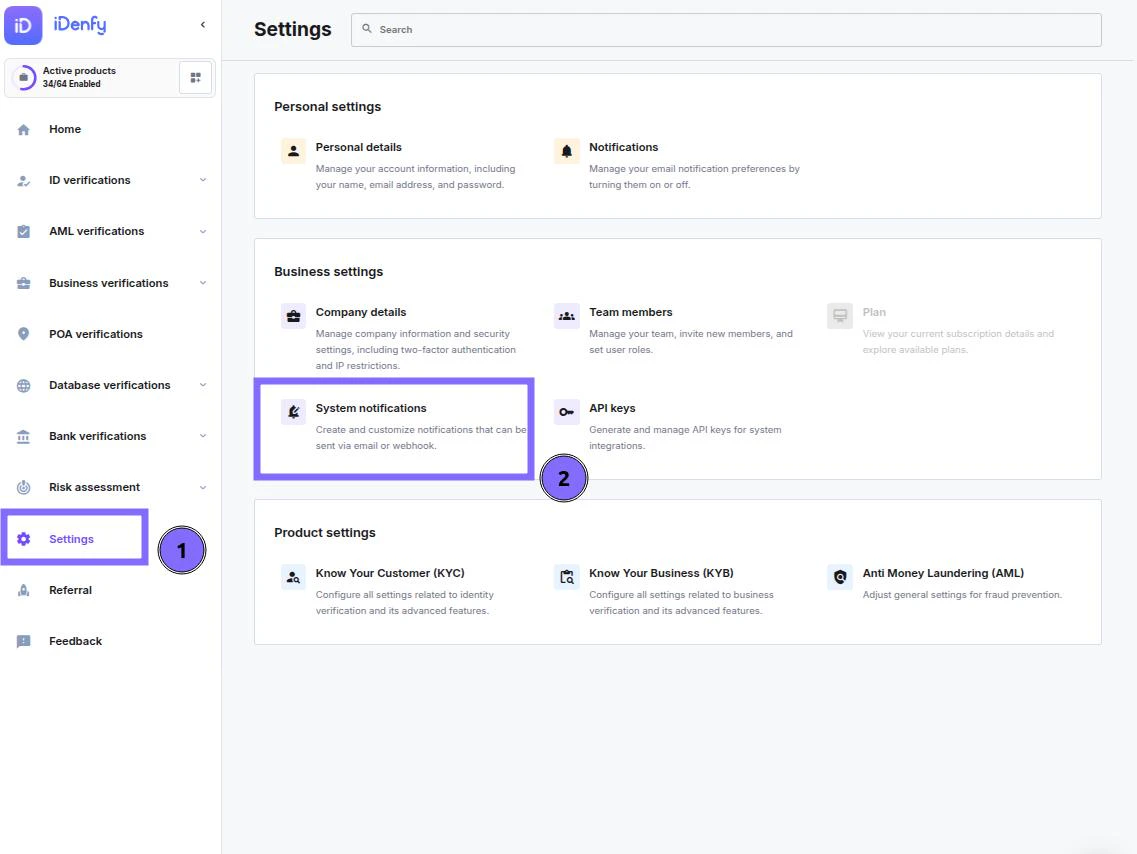
Creating a Notification
To start creating, simply select Create new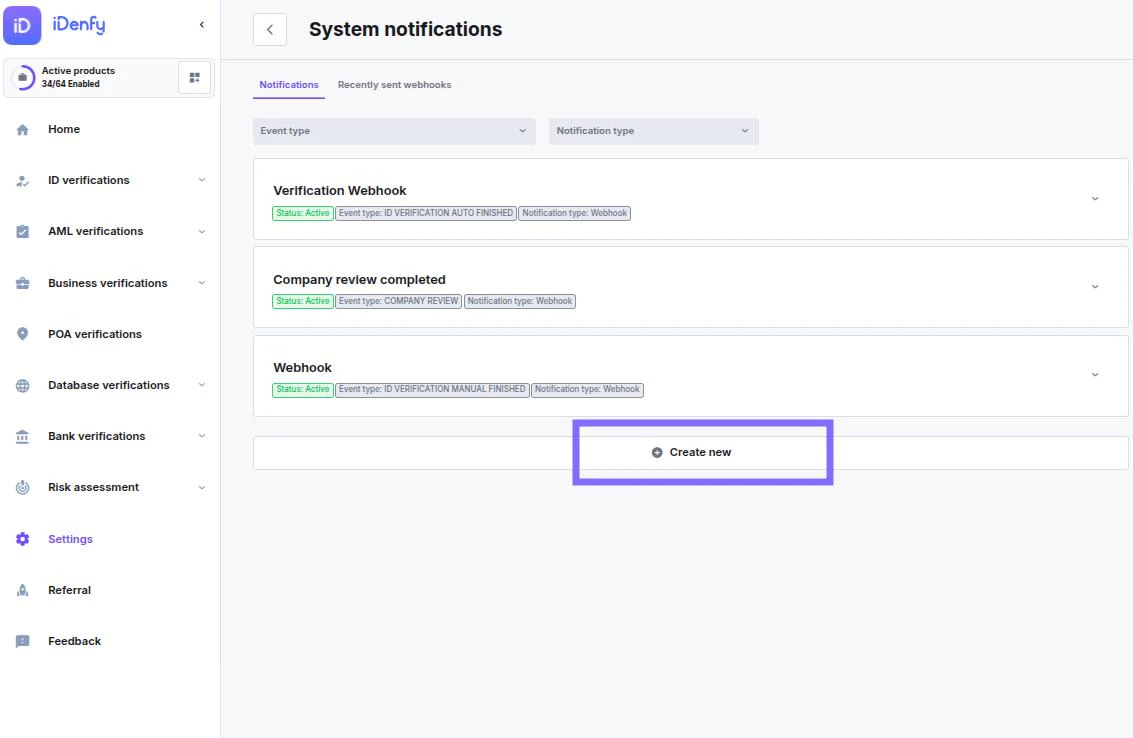
General Overview
Each webhook configuration consists of:- Name – internal name for your webhook
- Receiver (URL) – the endpoint where iDenfy will send the notification
- Event Type – defines which event will trigger this webhook (e.g., ID VERIFICATION MANUAL FINISHED)
- Status – shows whether your webhook is currently active
Only active webhooks will receive notifications.
Notification Details
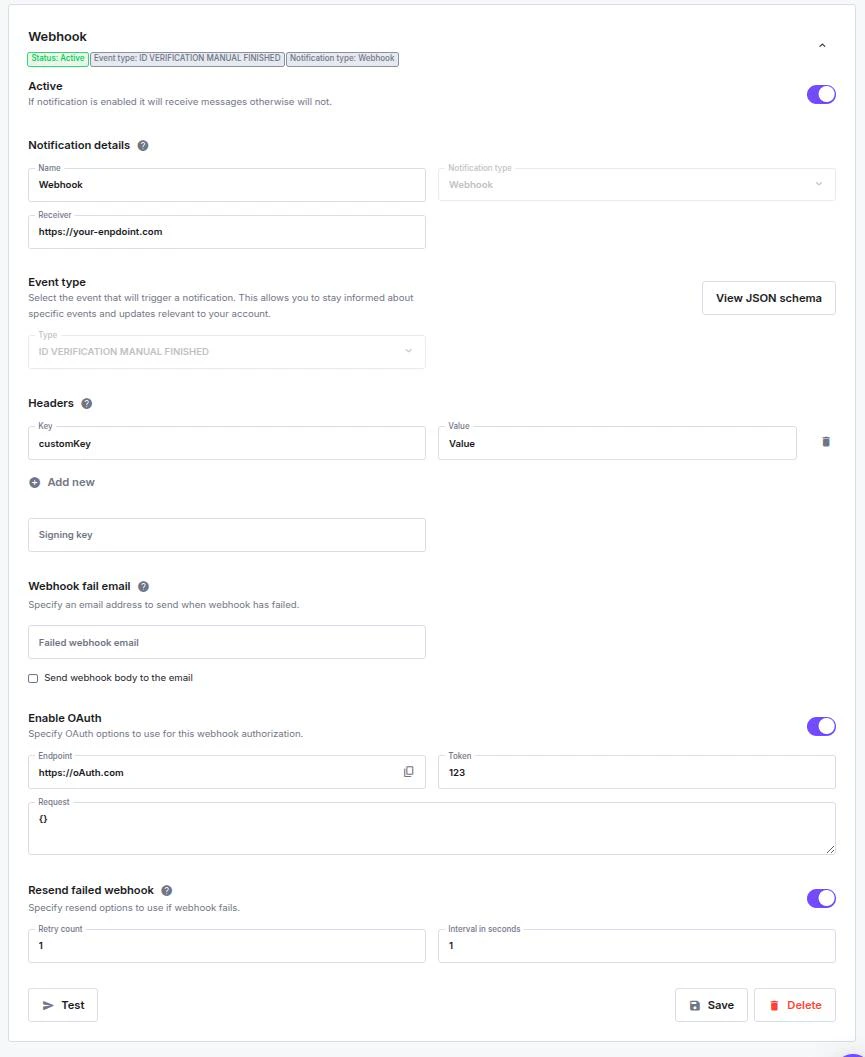
Name: give your webhook an easy-to-recognize label. Receiver: enter your endpoint URL (e.g.https://your-endpoint.com).
Notification Type: this field is fixed as Webhook.
Event Type
Select the event that will trigger the webhook. Click “View JSON schema” to see the payload structure for the selected event.Identity Verification
Event Types - KYC
Event Types - KYC
| ID VERIFICATION (Legacy) | Sent when a client completes an identity verification. Deprecated – use one of the specific events below instead. |
|---|---|
| ID VERIFICATION AUTO FINISHED | Sent when an identity verification completes automatically. |
| ID VERIFICATION MANUAL FINISHED | Sent when an identity verification is manually approved or denied. |
| ID VERIFICATION EXPIRED | Sent when an identity verification expires. |
| ID VERIFICATION CANCELED | Sent when a verification is canceled by the user or system. |
| ID VERIFICATION RESUBMITTED | Sent when a client resubmits their identity verification. |
| DOCUMENT EXPIRATION | Sent when a client’s identity document is nearing expiration or has expired. |
| FACIAL AUTHENTICATION | Sent when a facial authentication session ends (success, failure, or expiration). |
AML / Monitoring
Event Types - AML
Event Types - AML
| AML MONITORING | Sent when an AML monitoring user is checked, accepted, or declined. |
|---|---|
| AML MONITORING EXPIRATION | Sent when an AML monitoring user is nearing expiration or has expired. |
Company (KYB)
Event Types - KYB
Event Types - KYB
| COMPANY REVIEW | Sent when a company verification is completed. |
|---|---|
| COMPANY DELETE | Sent when a company is deleted. |
| COMPANY AML REVIEW | Sent when AML review status is manually updated for a company or its beneficiaries. |
| COMPANY INFO REQUEST | Sent when additional company information is requested or when a company form token expires. |
| COMPANY EXPIRATION | Sent when a company verification is nearing expiration or has expired. |
| COMPANY SUBMIT | Sent when company information is submitted. |
Other Services
Event Types - Other
Event Types - Other
| ACCOUNT CHECK | Sent when a social-media account check is completed. |
|---|---|
| GOV ORDERED DOCUMENT | Sent when a government registry document ordered via API is delivered. |
| SOS_REPORT | Sent when a SOS filing report is delivered. |
| BANK_VERIFICATION | Sent when a bank verification is completed. |
Headers
Add custom HTTP headers for your webhook requests. Each header consists of:- Key – name of the header (e.g.
Authorization) - Value – value for that header (e.g.
Bearer abcd...)
Click “Add new” to include multiple headers.
Signing Key
Add a custom signing key to verify the authenticity of incoming webhook requests. This helps ensure the payload wasn’t modified in transit.Webhook Fail Email
If the webhook cannot be delivered, iDenfy can send a failure notification to your chosen email address.- Failed webhook email: enter your address
- Optional: enable “Send webhook body to email” to include the failed request details
Enable OAuth (Optional)
You can authorize your webhook delivery using OAuth.- Endpoint: OAuth authentication endpoint
- Token: your access token
- Request: additional OAuth request body, if needed
This ensures webhook messages are securely delivered to your protected endpoints.
Resend Failed Webhook
If a webhook fails, you can automatically retry sending it.- Retry count: number of resend attempts
- Interval in seconds: time between each retry
Useful for temporary downtime or network interruptions.
Testing
Use the Test button to send a test request and confirm your configuration works correctly.Saving and Managing
When done:- Save to store your settings
- Delete to remove the webhook configuration
Debugging Notifications
In System notifications → select Recently Sent (top-right corner) to review sent notifications. You can:- Search by scanRef to find specific notifications.
- View response codes from your server:
0– No Response: Server unreachable.2xx– Success: Request delivered successfully.3xx– Redirection: Further action needed.4xx– Client Error: Your server couldn’t handle the request.5xx– Server Error: Request valid, but the server failed.- See the date and time each notification was sent.
- Attempt to resend the webhook.
- View full payloads in JSON format for debugging.
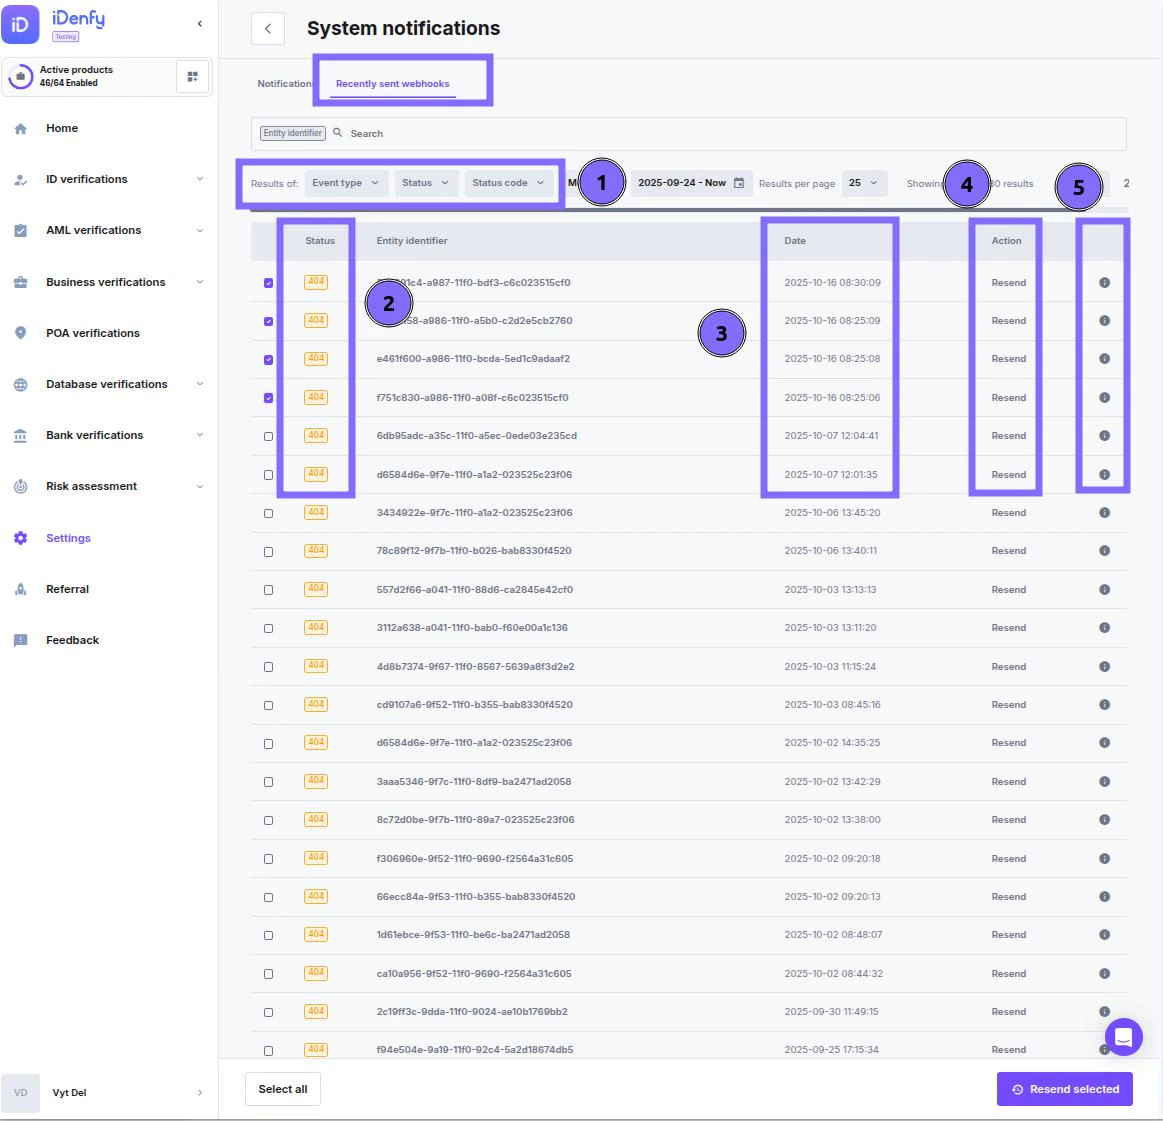
- We store Notification information for 30 days before it’s deleted
- We do not log information from callback responses.