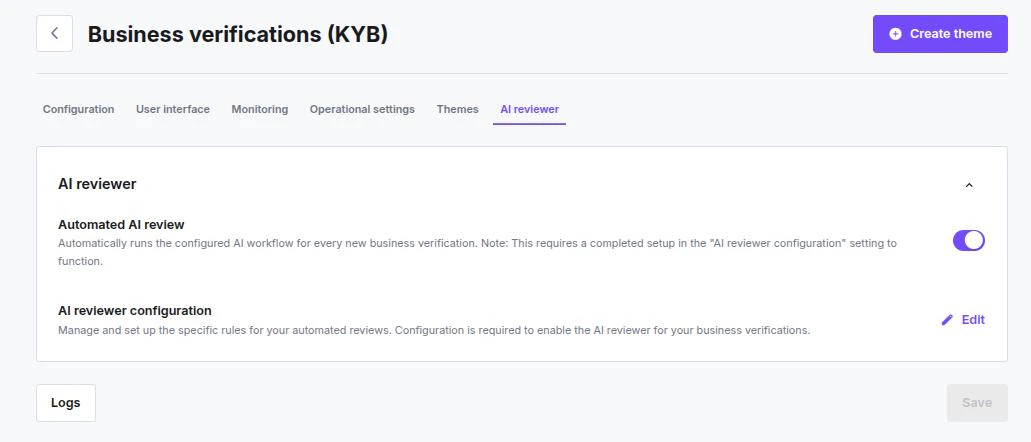
Settings Card
Automated AI Review
This toggle controls the global automation behavior for your account.- Enabled (On): The system automatically runs the configured AI workflow for every new business verification.
- Disabled (Off): The AI workflow will not run automatically. Verifications may need manual initiation.
This toggle only works if you have completed the setup in the AI reviewer configuration section below.
AI Reviewer Configuration
This is the access point for your validation logic.- Click Edit (pencil icon) to open the configuration modal.
- Use this to define your comparison rules, data sources, and final decision criteria (e.g. Approve vs. Flag for investigation).
You must configure these rules at least once before you can enable the Automated AI review toggle.
Configuring the AI Reviewer Workflow
Step 1 — Choose a Task
Open the AI reviewer modal. The starting point is the Choose a task menu, divided into two categories.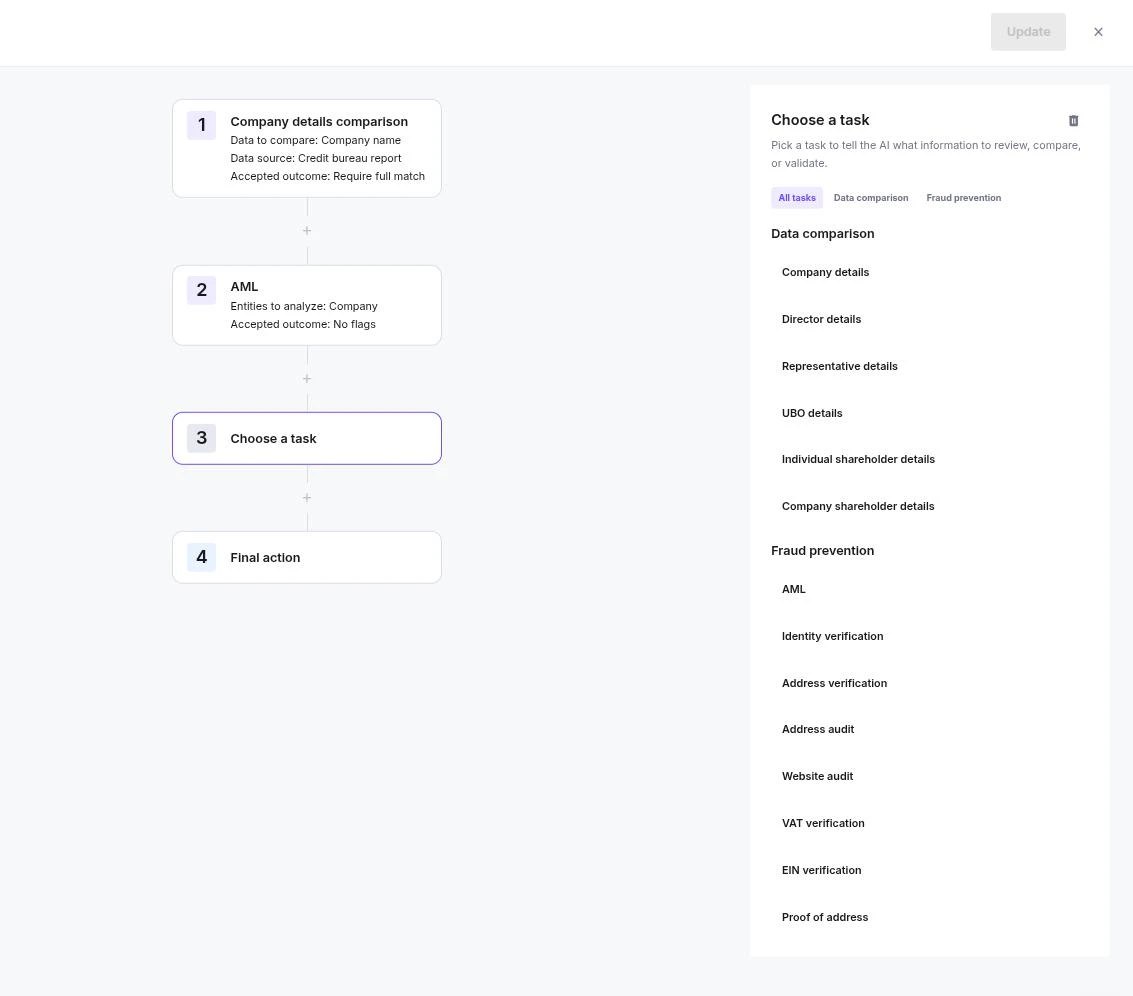
Data Comparison
Instructs the AI to cross-reference user-submitted data against trusted external sources. Available entities:- Company details
- Director details
- Representative details
- UBO (Ultimate Beneficial Owner) details
- Individual shareholder details
- Company shareholder details
Fraud Prevention
Instructs the AI to run security and compliance checks. Available tasks:- AML (Anti-Money Laundering)
- Identity verification
- Address verification & Address audit
- Website audit
- VAT verification & EIN verification
- Proof of address
Step 2 — Build the Rules Flow
Once you select a task, the modal splits into two panels: Left sidebar — Rules Flow: A numbered sequence of your configured checks (Step 1, Step 2, Step 3…).- Click + to add a new step.
- The flow always ends with a Final action step.
Click Update when you are finished to save your configuration.
Step 3 — Configure a Data Comparison Task
When you select a Data Comparison task (e.g. “Company details comparison”), define three parameters: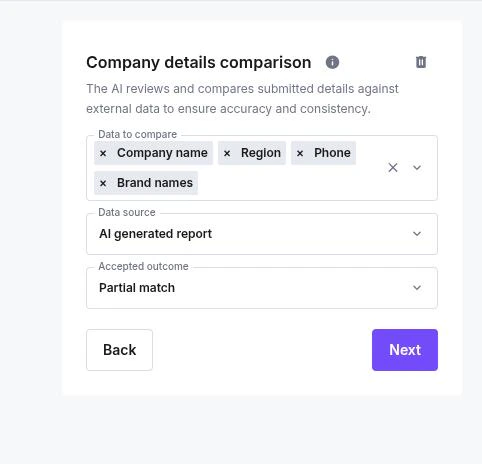
Available Fields
Available Fields
- Registration number
- Country
- Region
- Type (Company legal form)
- Phone
- Website
- Brand names
- Activity code
- TIN (Tax Identification Number)
- Operating address
- Postal address
- Postcode
- Street
- City
- All fields (compares every available data point)
Available Sources
Available Sources
- Credit bureau report
- GOV registers report
- SOS filings report (Secretary of State)
- AI generated report
- GOV registers filings report
- Uploaded document
- Require full match — data must be exactly identical.
- Partial match — slight variations are accepted (e.g. “Inc.” vs “Incorporated”).
Step 4 — Configure a Fraud Prevention Task
The configuration fields depend on the task selected: AML (Anti-Money Laundering)- Entities to analyze: Company, Director, Representative, UBO, Individual shareholder, Company shareholder.
- Accepted outcome: No flags (completely clear) or False positive (known false positive allowed).
- Entities to analyze: Director, Representative, UBO, Individual shareholder (physical individuals only).
- Entities to analyze: Company, Director, Representative, UBO, Individual shareholder, Company shareholder.
- Accepted outcome: Match.
- Accepted outcome: Verified, Partially verified.
- Accepted outcome (risk tolerance): Very low, Low, Medium, High, Very high.
- Accepted outcome: Verified, Not checked.
Step 5 — Configure Final Actions
The last step in every flow is Final action. It defines how the system reacts once all checks have run.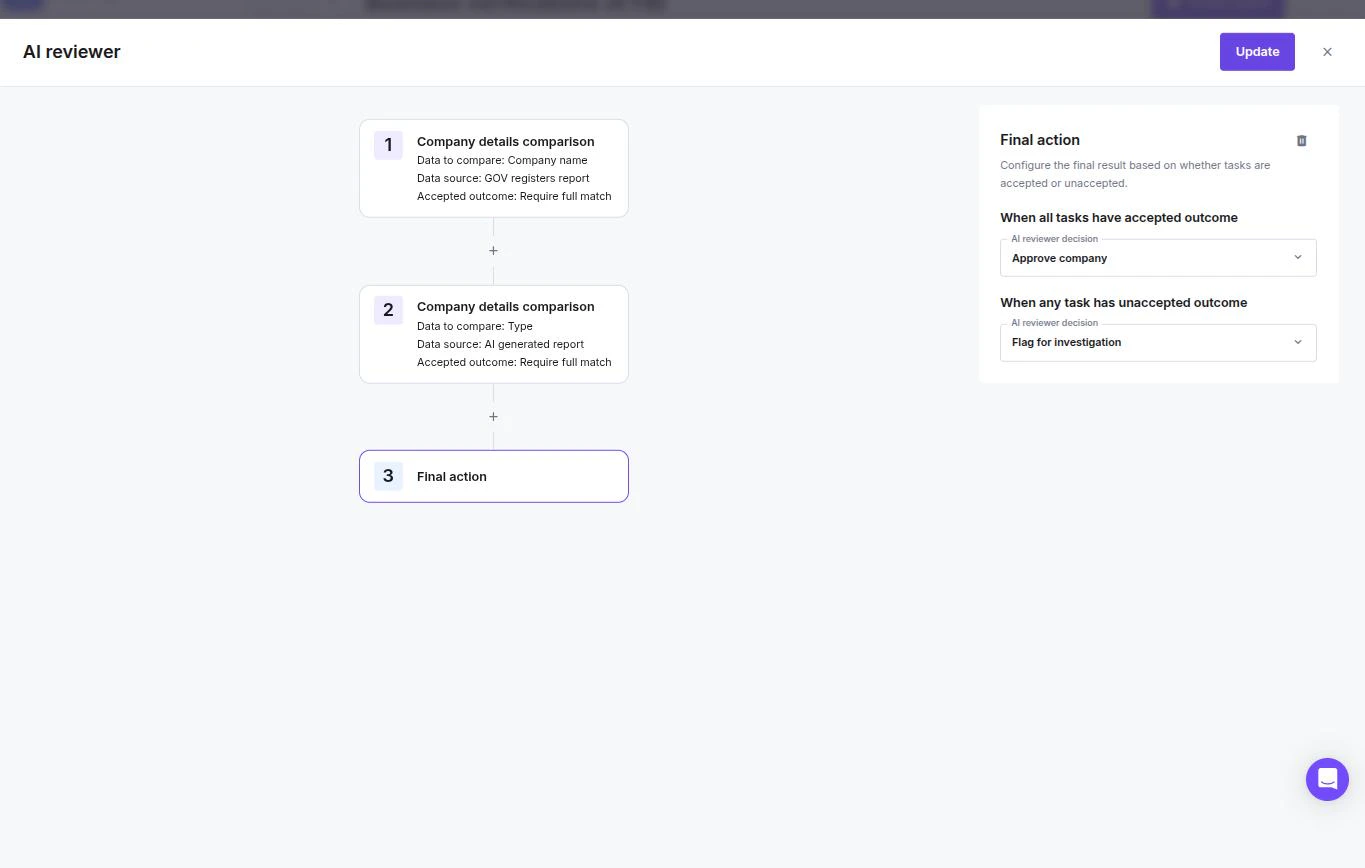
- When all tasks have accepted outcome — set the action if every rule passes (e.g. Approve company).
- When any task has unaccepted outcome — set the action if even one rule fails (e.g. Flag for investigation).
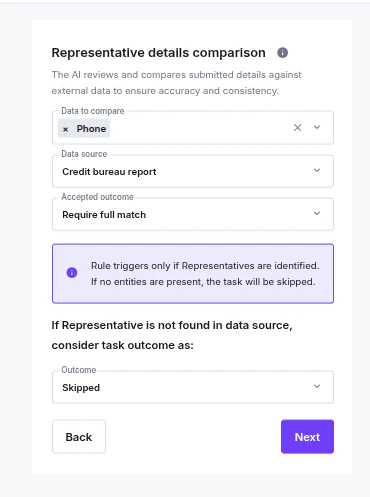
Handling Missing Data in Comparison Steps
Data comparison steps (such as individual shareholder details, director details, etc.) have two built-in behaviours for when data isn’t available: When no entities are present If the entity type itself doesn’t exist on the case — for example, no individual shareholders have been identified — the rule is skipped automatically. This is indicated by an info note on the step card:“Rule triggers only if Individual shareholders are identified. If no entities are present, the task will be skipped.”When an entity exists but isn’t found in the data source If a shareholder (or other entity) is identified on the case but cannot be matched in the selected data source, you can now configure how that should be treated. Each data comparison step includes an Outcome dropdown:
“If Individual shareholder is not found in data source, consider task outcome as: [Outcome]”Available options include Skip — meaning the check is disregarded rather than counted as a failure. This prevents cases from being flagged or denied solely because a data source doesn’t have a record for that entity, rather than because anything is genuinely wrong.
Navigation and Validation
- Disabled buttons — the Next or Update buttons stay disabled until all required fields in the current card are filled correctly.
- Error states — leaving a required dropdown blank or entering invalid data highlights the field in red with a warning icon.
- Adding to the flow — once a card is valid, clicking Next adds it to the Rules Flow on the left so you can configure the next step.