Navigation
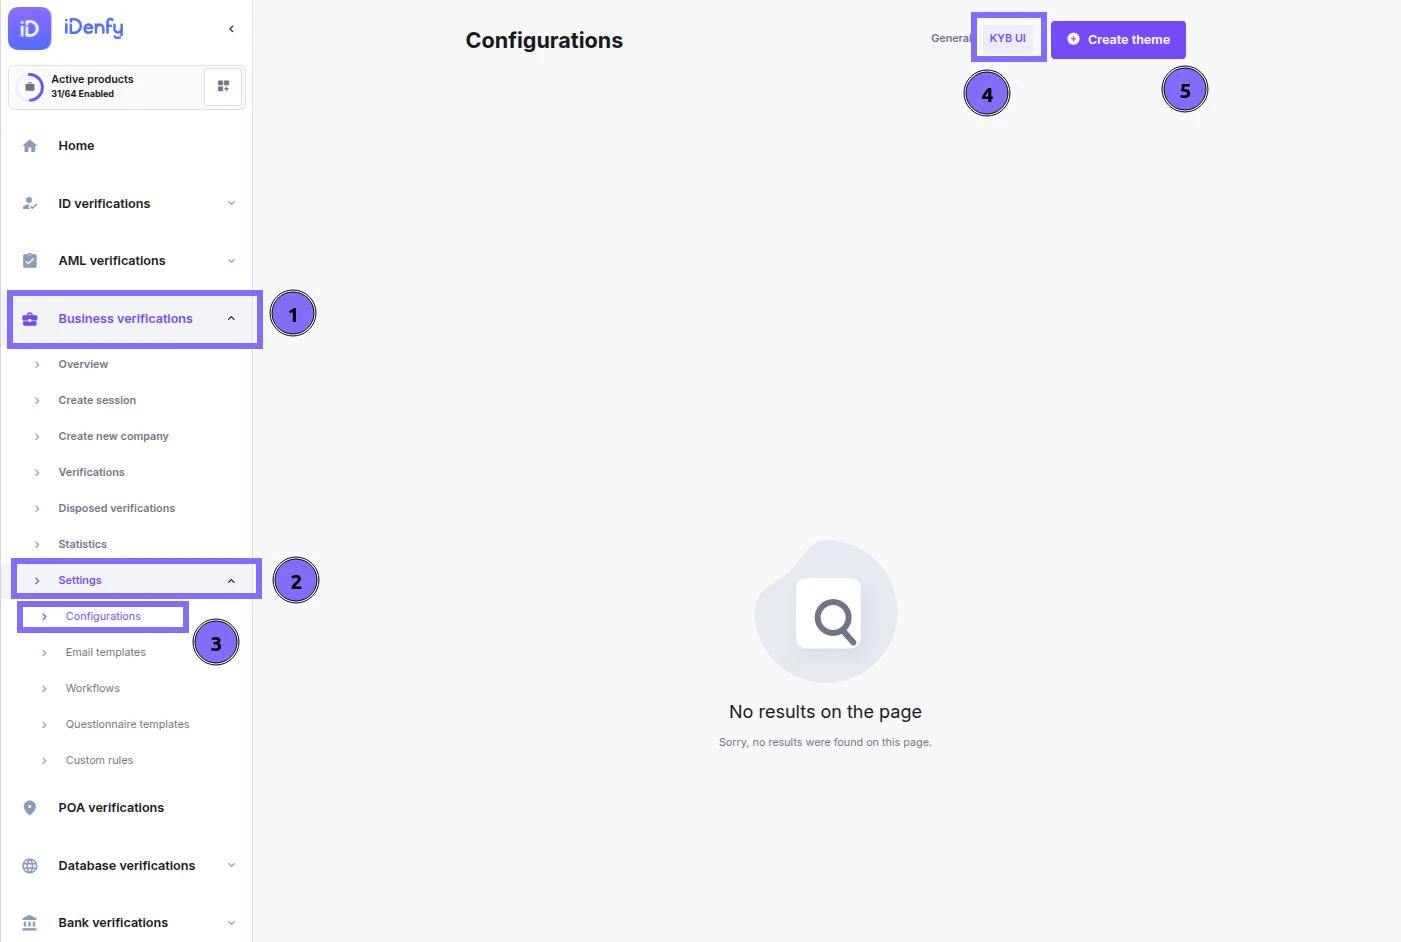
- Click on “Business verifications” on the left-hand navigation pane.
- Expand the “Settings” menu by clicking on it.
- Click on “Configurations” within the expanded “Settings” menu.
- Once on the “Configurations” page, click on the “KYB UI” tab at the top.
- Click on the “Create theme” button to begin creating a new theme.
Theme Configuration
Custom themes allow you to personalize the look and feel of the platform to match your company’s brand identity. This guide outlines how to create a theme, customize its visual elements, and preview the results.🪄 Step 1: Start a New Theme
Begin on the Create new theme page and provide the basic information:- Theme name – A unique and descriptive name (e.g., KYB primary theme).
- Theme description – Short description to help distinguish it (e.g., Theme version 1).
- Company name – Displayed to your clients in the interface.
- Support email address – Where clients can send support inquiries.
🅰 Upload Company Font
- Click Upload font.
- In the pop-up, upload your company’s font file. Recommended formats:
- Click Save once uploaded.
🅱 Customize Interface Colors
- Click Select colors.
- In the pop-up, use the two tabs to set colors:
- After adjusting, click Save colors.
🆎 Upload Company Logo
- Click the Upload logo.
- In the pop-up, upload your full-sized company logo. Accepted format:
- Click Save once uploaded.
Step 3: Preview and Save
- Click Preview KYB UI.
- A pop-up will show a mock-up of the interface with your theme (name, logo, font, and colors).
- If satisfied, close the preview and click Create new theme to save and activate it.