Adding Documents
Standard Documents
Use pre-defined categories to quickly add common verification requirements.- Click the + Documents button.
- A popup appears with categories tailored to the entity type:
- For Individuals: Select from Individual documents, such as Identity Document or Proof of Address.
- For Companies: Browse categories like Incorporation documents (e.g., Shareholder Registry), Ownership and structure, or Financial documents.
- Check the boxes for the documents you require and click Add documents.
Custom Documents
If you need a document that isn’t in the standard library (e.g., a Power of Attorney or a signed agreement):- Click + Documents and scroll to the Create custom documents section.
- Select the quantity of custom slots you want and click the plus (+) icon.
- Name the document slot once it appears in your list.
Configuring a Document Slot
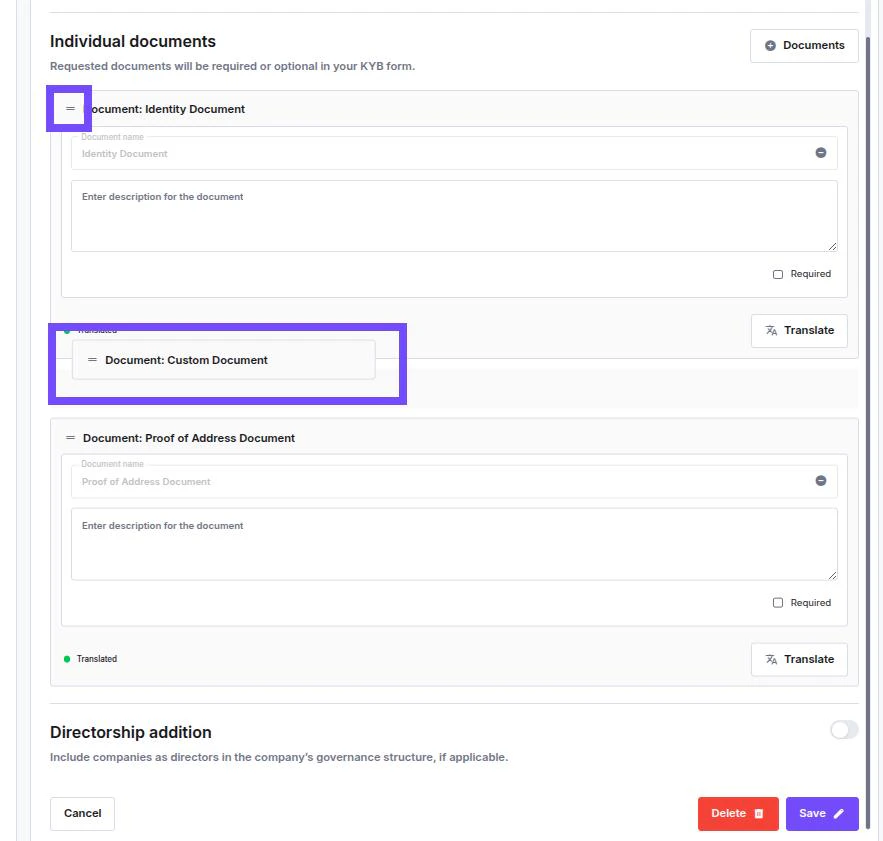
Every document slot — whether standard or custom — has the same set of configurable options:- Document name — Pre-set and locked for standard library documents. Editable for custom documents.
- Allowed document type — Restrict which file formats the client can upload for this slot. Select one or more from: PNG, JPG, HEIF, PDF. If left unrestricted, all formats are accepted.
- Description — Optional instructions shown to the client so they know exactly what to upload.
- Required — Toggle to make the document mandatory. Optional documents can be skipped by the client.
- Translate — Add translated versions of the document name and description for multilingual flows. A Translated badge appears on slots that already have translations.
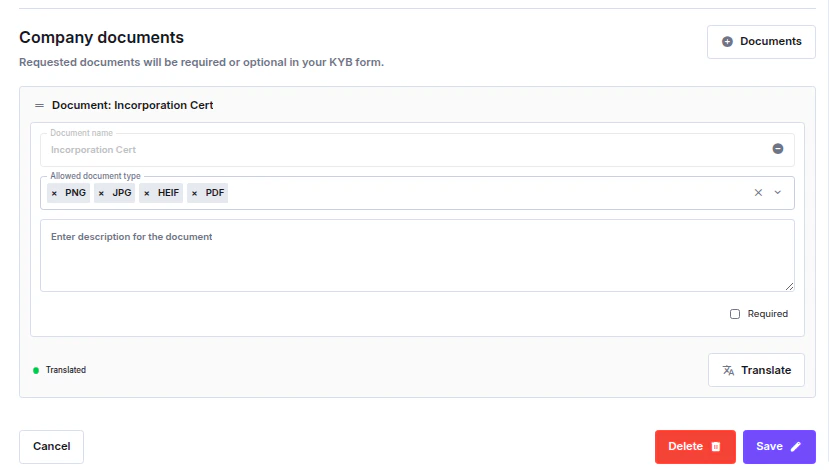
Company Documents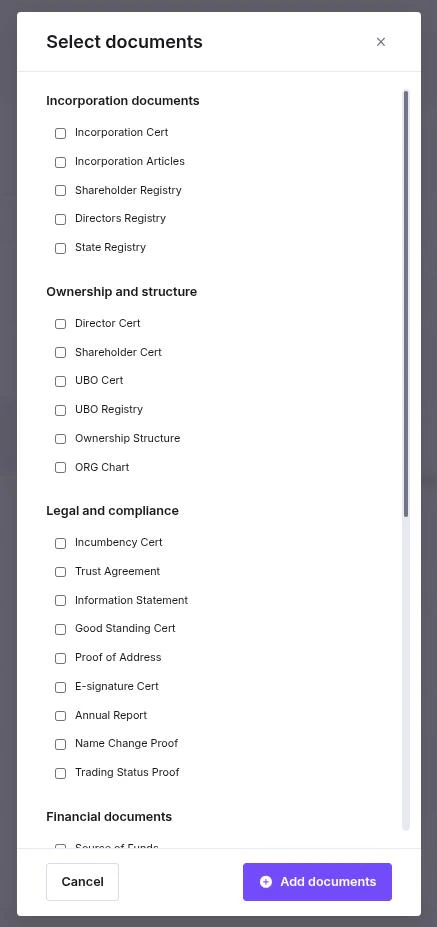
Individual Documents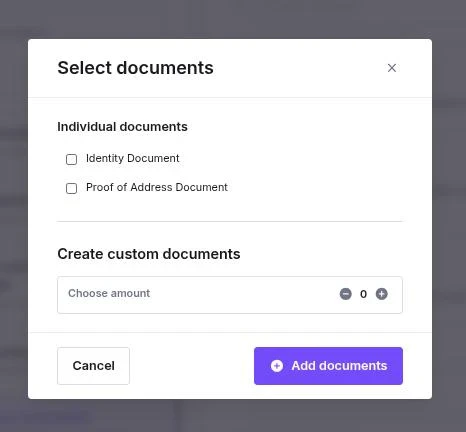
Reordering Documents
Change the order documents appear to the client by clicking and holding the drag handle on the left side of any document row and moving it up or down.