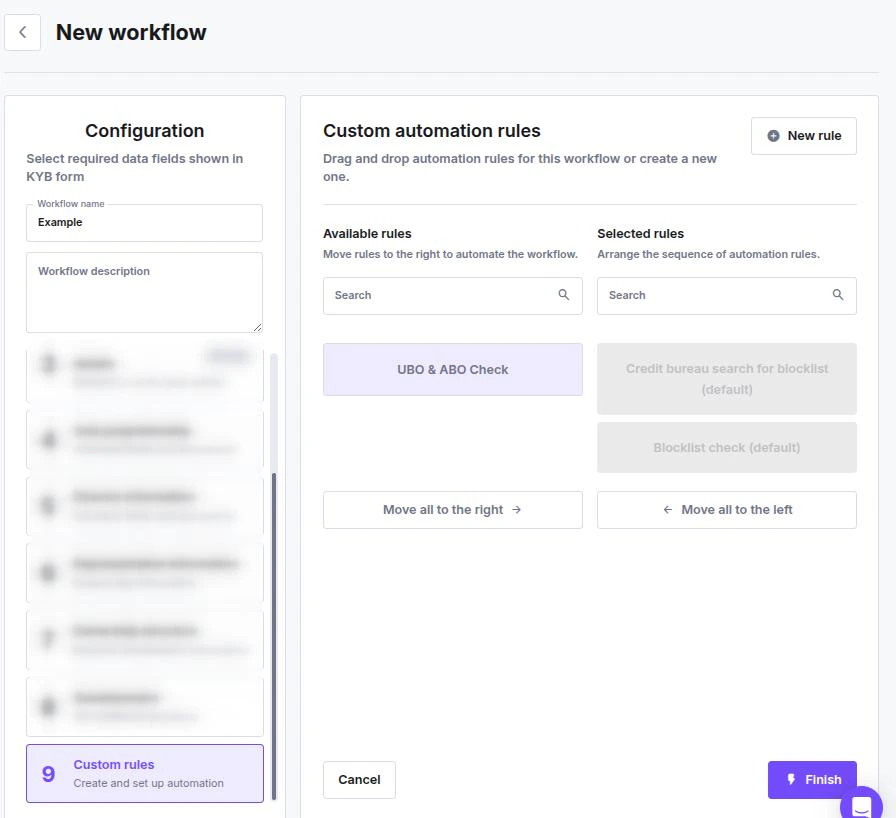
- Available rules (Left): A list of all pre-configured automation rules available in your account.
- Selected rules (Right): The rules that will actually run for this specific workflow.
How to Configure
- Add a Rule: Drag and drop a rule from the Available column to the Selected column. You can also use the Move all to the right button to select everything at once.
- Remove a Rule: Drag a rule back to the left column or use the Move all to the left button.
- Set the Sequence: The order of the rules matters. In the Selected rules column, drag and drop items up or down to define the sequence in which the system should perform the checks.